The Beauty of Red – times TWO!

written by Becky

Two Different Red Velvet Whoopie Pies with Cream Cheese Filling

Which is better? Left is Whoopie Pies recipe, right is Whoopies! recipe

I admit it, I have two pairs of shoes that are almost identical but one pair is black and one pair is white. This may seem like a good idea but what pair do you wear with a black and white dress? Or do you wear the fabulous red strappy ones instead? Here is my problem: I have trouble making decisions with some things. I have actually gone on vacation with 12 pairs of shoes (10 day vacation) and took pictures of my feet in each pair just to prove that I in fact did wear every pair. I know this may seem weird to some of you but I have some great shoes that I don’t get to wear frequently so instead of choosing which ones I want, I just take all of them!

Oh decisions...

I have the same problem with recipes: when you have two whoopie pie books and each has a Red Velvet recipe, which one do you choose?? That was my dilemma when I decided that I wanted to make them. I had made one recipe about 6 months ago but how do you compare that recipe to a different one without trying them simultaneously? Well to me the answer was simple: make both!

Any time I take Red Velvet somewhere people always ask what exactly the flavour is supposed to be. Generally it is described as a vanilla cake with a touch of cocoa plus some food colouring to give it the signature red-brown colour (although apparently you can you use beet puree but I haven’t tried it yet) . The reaction of the buttermilk with the vinegar (yes, there is vinegar in the cake) enhances the bright colour. Interestingly, as I just found out, before Dutch process cocoa became available the red colour was more pronounced because the cocoa was less alkaline. Since the description of the cake isn’t that impressive, I must point out that it is all about the moist and tender crumb. It really is a delicious cake!

First is the recipe from “Whoopies!” (on the left in the picture). This one was sort of interesting because you mix the red food colouring with the buttermilk, vanilla and vinegar in a bowl prior to adding it to the whoopie batter. I am not sure exactly what this does though. Regardless, this recipe makes what I think of as a more traditional Red Velvet crumb and a brighter red colour. Here’s the recipe:

Red Velvet Whoopie Pies I (makes 20 medium sized Whoopie Pies)

  • The red liquid mix

    1/2 cup buttermilk

  • 1/2 tsp vanilla
  • 1/2 tsp red paste food colouring
  • 1 1/2 tsp white vinegar
  • 1/2 cup butter, softened
  • 1 cup white sugar
  • 1 egg
  • 2 cups flour
  • 1 tbsp cocoa
  • 1/2 tsp baking soda
  • 1/4 tsp salt
  1. Preheat oven to 375°. Line baking sheets with parchment paper
  2. In a small bowl, stir together buttermilk, vanilla, red food colouring, and vinegar.
  3. Beat together butter and sugar until light and fluffy. Add the egg and beat more.
  4. In a different bowl, whisk together flour, cocoa, baking soda andsalt. Alternating with the buttermilk mixture, add to the butter/sugar (start and end with the dry ingredients).
  5. Scoop, pipe or spoon the batter onto the baking sheets.
  6. Bake 10-12 minutes. They are done when you can push lightly on the top and the whoopie pies spring back and don’t leave a dent.
  7. Allow to cool on the sheet a few minutes and then transfer to a rack to cool completely.
  8. Fill with Cream Cheese Filling recipe provided at the end.

    Piped Whoopies

Red Velvet Whoopie Pies II (makes 30 medium sized Whoopie Pies)

This recipe is adapted from the Whoopie Pies cookbook (shown on the right above). Although most testers said they prefer this recipe, I think it is actually because the cake is chocolate’ier and denser rather than it being more “Red Velvet-Like”. I still haven’t really decided which one I prefer. I guess it depends what you are looking for.

  • Recipe #2 Piped

    3 cups flour

  • 1/4 cup cocoa
  • 1 tsp baking powder
  • 1/2 tsp baking soda
  • 1/2 tsp salt
  • 1 cup butter, room temp
  • 1/2 cup brown sugar
  • 1 cup white sugar
  • 2 eggs
  • 2 tsp vanilla extract
  • 1 tsp red gel paste
  • 1 cup buttermilk
  1. Preheat oven to 350° and line baking sheets with parchment paper.
  2. Whisk together flour, cocoa, baking powder, baking soda and salt.
  3. Beat together butter and sugars until fluffy and smooth, about 5 minutes.  Add the eggs one at a time and then the vanilla and red food colouring.
  4. Add the flour mixture and buttermilk alternatively starting and ending with the flour mixture. Beat until combined.
  5. Using a spoon, scoop or piping bag, put about 1.5 Tb per cookie.
  6. Bake 8-10 minutes (or until the cakes spring back when lightly pressed)
  7. Allow to cool a few minutes on the cookie sheet before transferring them to a rack to cool completely.
  8. Fill with Cream Cheese Filling

Cream Cheese Filling

  • 1 pkg (8oz) cream cheese, room temp
  • 1/2 cup butter, room temp
  • 1 tsp vanilla
  • 3 cups icing sugar
  1. Beat together cream cheese and butter. Add vanilla then sugar (1/2 cup at a time)

Double Vanilla Whoopie Pies with Chai Spice Filling

written by Becky

Double Vanilla Whoopie Pies with Chai Spice Filling

Paired off! Note the "Grande" sized Whoopie Pie... it was featured in the "How to eat a Whoopie Pie" post!

I doubt anyone has really noticed that there is no recipe for the Whoopies that star as our header on this blog. Or that the Whoopie Pies devoured in our “How to eat a Whoopie Pie” post are not discussed anywhere. Well here it is! And it is a good one! Just writing the title of this post makes me want to drool (well almost). I made these Whoopie Pies a couple months back but I had made a couple batches of Whoopies that week and thought I would save this post for a week when we didn’t have a recipe to post. And since the post on Chocolate Mint Whoopie Pies that Courteney promised has yet to arrive, I figure it is time to post about these delightful Whoopies!

These were made to please some of my fabulous friends from the gym. Now some people figure that gym-friends (as I like to call them) may not like to eat since they are so “health-conscience” and fit but that isn’t true at all! Realistically, we LOVE food! And that is why we love the gym: it allows us to love food! (Although there are also some of us that really love working out for lots of reasons on top of the calorie burn!) Anyways, it was a good thing that I set aside a half dozen of these to take to my taste testers at work as otherwise there would be none left! I won’t mention any names but one of my favourite foodie-gym-friend’s kindly requested to take a couple extra home insisting they were for her “son”… I now know it was a ploy to have extra for herself!

Double Vanilla Whoopie Pies

(makes 16 or so)
adapted from Vanilla Whoopie Pies in Whoopie Pies by Sarah Billingley and Amy Treadwell

Adding the extract.

  • 2 1/4 all purpose flour
  • 1 1/2 tsp baking powder
  • 1/2 tsp salt
  • 1/2 cup butter
  • 1/2 cup white sugar
  • 1/2 cup packed brown sugar
  • 2 eggs
  • 1/2 cup buttermilk
  • 2 Tb milk
  • 1 tsp baking soda
  • 1 tsp white vinegar
  • 1 tsp vanilla extract
  • 1 vanilla bean – scraped to remove the vanilla (see a video here) (not totally necessary but it is what makes it “double” vanilla and it is SO incredible!)

    Before baking!

  1.  Preheat oven to 375°F. Line two baking sheets with parchment paper.
  2. Whisk together flour, baking powder & salt in a bowl
  3. In the bowl of a stand mixer, beat the butter for a minute or so and then add the sugars. Continue beating for another couple of minutes until light & creamy. Add the eggs one at a time.
  4. Add the buttermilk slowly with the mixer on low.
  5. In a small bowl or measuring cup, add the baking soda and then the vinegar to the milk.
  6. First mix in about half the flour mixture, then the milk mix, then finally the rest of the flour. Mix in the vanilla and the vanilla bean “scrapings” (I wonder what that inside part is actually called?)
  7.  Drop, scoop or pipe about 1-2 Tb of batter onto the baking sheets. Space them well as these cookies spread!
  8. Bake 8-10 min or until the cookies just start to brown. Allow them to cool a few minutes before transferring them to a drying rack.

Baked Whoopies! They look so lovely and poofy!

This is the part called "finding your partner" - the outsides of the Whoopie Pies should be about the same size.

Chai Spice Filling

I feel like I should add a comment here about how reliable the filling recipe is: I made these two months ago, I don’t remember exactly what I did for the amount of spices. Sorry! This is a guess… I should have made notes!

  • 1/2 cup butter (room temp)

    More Cinnamon Please! I love cinnamon so I added more here!

  • 4 cups icing sugar
  • 1/4 cup boiling water
  • 1 chai tea bag
  • 3/4 tsp cardamom
  • 3/4 tsp ginger
  • 1 1/2 tsp cinnamon
  • 1/4 tsp ground cloves
  • 1/4 tsp nutmeg
  • 1/4 tsp allspice
  • 1 tsp vanilla
  1. Place tea bag into small container with the 1/4 cup water. Allow to steep for as long as you can wait… and allow the water to cool.
  2. Whisk together the spices with 1 cup of icing sugar.
  3. Beat the butter then add the  1 cup of icing sugar. Add the water steeped with tea and the vanilla.
  4. Add the rest of the icing sugar (and more if needed to reach “piping” consistency). Spread between two cookies and enjoy! Mmm…
Adjust the amount of spice to what you like! If you don’t like it as spicy, reduce amounts! If you like one spice better, increase it! I plan on trying to make this filling with the concentrated Chai tea mix but I haven’t tried it yet.

Mountain o' Tasty Whoopie Pies! Double Vanilla with Chai Filling


Be back soon!!

Written by Courteney
Just a quick non-update: SUPER-sorry I haven’t updated in a very long time. I do have a post ready and waiting to be shared, but work has temporarily taken over my life. I promise I’ll make some time next week to write it all out.  Don’t go away!


Hot News for Whoopie Pies!

written by Becky

A few things have happened lately that I feel it is important to inform you all about in the world of Whoopie Pies:

  • On April 20th (yes over a month ago – sorry for the late update, I know everyone was on the edge of their seat waiting for this info!), Maine passed legislation to making the Whoopie Pie the official State dessert. It is now officially a public law. Read more here
  • A Whoopie Pie maker is now available for sale! This is a device made by Babycakes and it has one review: that it is not adequate for the true whoopie pie lover or maker. I guess I won’t be getting one!
  • The Maine Whoopie Pie Festival is coming up at the end of June. Sadly I won’t be there (I’ll be running a half marathon. As will Courteney – it will be her first! Very exciting.) But this guy will be!
  • Whoopie Pie Wednesdays – the only other blog that I can find that has a section devoted to Whoopie Pies – will be coming to an end this week! This girl (interestingly also named Rebecca and also obsessed with Whoopie pies) took it upon herself to make all of the Whoopie pies (plus some extras) in the Whoopie Pie cookbook that we all love so much for her coworkers every week. Since discovering her blog, I have been enjoying seeing what other people thought of each of the flavours and making notes so that I can improve on the recipes that she tried! Thanks Rebecca! If you read through a flavour that you desperately need to try – let me know! I have no intentions on continuing the tradition here but… actually that would be fun… hmm. Point is to request a flavour if you want!
  • I actually got a second Whoopie Pie book – Whoopies! – which I am just as excited to start baking from! So far I haven’t tried any recipes!
  • Unrelated to Whoopie Pies but still of interest, I have started a second blog – Bex Bakes and Cakes – which will be for all my other baking, besides Whoopie Pies of course. Both blogs now have the recipes indexed (note that this site has two extra pages – one for Whoopie Pie recipes, the other for other baking – while the other blog just has all recipes indexed) so they link to each other.

Almond Whoopie Pies – Two ways!

written by Becky

Almond Whoopie Pies with Lemon Cream Cheese Filling AND/OR
Zucchini-Almond Whoopie Pies with Almond Cream Cheese Filling

This was the first batch of by request “how would you make your perfect Whoopie Pie”. After posting the “What’s Your Flavour?” post, I had a few requests for the perfect flavour for that person! Since my friend Nicole was the first to

These two sure came in handy! I bought them at Costco awhile back but they haven't been used in the same recipe yet!

submit her request, by text, she is the first to get her “perfect Whoopie” (or hopefully perfect! She hasn’t yet tried them – hopefully she will comment tomorrow!) Nicole’s request was an Almond Whoopie Pie with Lemon Cream Cheese Filling.

So you may be wondering why the “two-ways” if Nicole only made one request. Well the second half of the batch were created after talking to a friend who claimed she had never had a Whoopie Pie. During this same conversation, we discussed an amazing Almond-Zucchini Bundt Cake she had made once. This cake sounds like it could almost be healthy but with a LOT of sugar, butter and sour cream, it is obvious the zucchini is simply for moisture and not for any vegetable servings! So I figured, since Nicole didn’t need an entire batch of Whoopie Pies just for her, I would alter half of the batter and make Almond-Zucchini Whoopie Pies with Almond Cream Cheese Filling to share with my friend. After scooping enough regular Almond Whoopie Pies, I then stirred in some zucchini to the second half. Of course, I forgot that this would add a lot of moisture so after baking half, I had to add more flour to the mix to get the same lovely whoopie pie mounds that I was hoping for. I then paired a flat and a fat Whoopie pie together for each cookie!

Here is how it was done:

Almond Whoopie Pies with Lemon Cream Cheese Icing

Adapted quite a bit from the Vanilla Whoopie Pie found in the book Whoopie Pies by Sarah Billingsley & Amy Treadwell

  • 1 3/4 cup all-purpose flour

    Scooping the Whoopies!

  • 1/2 cup ground toasted almonds (toast slivered ones and then grind in food processor)
  • 1/2 tsp salt
  • 6 Tb butter, room temp
  • 2 Tb shortening (could use all butter)
  • 3/4 c packed brown sugar
  • 1/4 c white sugar
  • 2 eggs
  • 1/2 cup buttermilk
  • 2 Tb almond milk (regular is fine, I just happened to have almond milk)
  • 1 tsp baking soda
  • 1 tsp  white vinegar
  • 1 tsp vanilla extract
  • 1 tsp almond extract
  • sliced almonds
  1. Preheat oven to 375 and line baking sheets with parchment paper.
  2. Whisk together flour, ground almonds & salt in a bowl.
  3. In a stand mixer (or with a hand mixer), beat together butter and shortening and then beat in the two sugars until light and creamy, a few minutes. Add the eggs, one at a time, and then the buttermilk and beat until well combined.
  4. In a measuring cup or small bowl, mix milk, baking soda and vinegar.
  5. Add half of the dry mix to the mixer while beating, then the milk and finally the rest of the dry mix.
  6. Add the extracts and beat until just combined.
  7. Using a spoon, cookie scoop or piping bag, scoop/pipe cookies onto the prepared cookie sheet.

    Look how much those little guys spread! The left is before baking, the right, after.

    Put several sliced almonds to the tops of half of the Whoopie Pies.
    As a sidenote: these whoopies spread quite a bit so don’t make them too huge!

  8. Bake 8-10 minutes until just barely browned.
  9. Remove from oven, allow to cool a few minutes on the cookie sheet and then transfer to a rack to cool completely.

Lemon Cream Cheese Filling

  • 1 pkg cream cheese, room temp
  • 1/2 cup butter, room temp
  • lemon zest from one lemon
  • 3/4 tsp lemon extract
  • 2-3 cups icing sugar

 Beat together cream cheese and butter. Add lemon zest and extract. Beat in icing sugar 1/2 cup at a time.

Almond Whoopie Pie with Lemon Cream Cheese Filling

Zucchini Almond Whoopie Pies & Almond Cream Cheese Filling

Follow above recipe but add the following:

Grated Zucchini!

  • 1 zucchini, grated and squeezed between paper towel to remove as much liquid as possible
  • 3/4 cup all purpose flour

Add the flour with the rest of the flour. (This amount is approximate since I didn’t add this flour at first and I only added zucchini to half of the batch I made.)

Mixing in the Zucchini!


Stir in the zucchini at the end.

Almond Cream Cheese Filling

Make as the lemon filling but do not add the zest or the lemon extract. Instead add 1 tsp almond extract.

Zucchini Almond Whoopie Pie with Almond Cream Cheese Filling


Whoopie Pie Pans: The Pros and Cons

Written by Courteney

One frequent question that comes up when we talk about whoopie pies is the cookie: how do we make them?  Generally, I tell people there are two choices:  you can spoon/scoop them (using a spoon or a cookie scoop) or you can pipe them (i.e. like icing).  I always go for the scooping option, as (a) I like my cookie scoop, even if it is too big for a whoopie pie, and (b) I don’t have the tips or the piping skills to pipe them.  Becky has piped them once, to my recollection, and they turned out beautifully.

However, there is another option.  A few months ago, Becky sent me a link for whoopie pie pans.  Apparently, someone out there thought, “We have muffin pans, brownie pans, muffin top pans – why not whoopie pie pans?” and a creation was born!

Pros:  Quality control, mass production, efficiency, branding
By providing a standard size for your whoopie pie cakes, you never have to worry about matching sizes to get equal-sized tops and bottoms (something I tend to encounter when scooping/spooning).  This also allows you to streamline your assembly line and mass produce.

I caught an episode of NCIS: LA one night a couple weeks ago.  During the episode, the main cast was tracking a killer who had left a fortune cookie at/near the scene (this was not an integral part of the story, but stay with me here).  Apparently, every fortune cookie is labelled with a tiny microscopic brand that allows you to trace back the fortune cookie to its maker.  Don’t ask me if this is really true or a construct that was created to fit the plot line, but that got me thinking: wouldn’t that be a great way for self-advertisement?  If you could ‘brand’ every one of your whoopie pies with your store name, logo, or url, then you’d have your own edible advertisement of deliciousness!  And, short of actually creating a brand and burning it into each of your whoopies (because, well, burned, ew, duh), what would be the easiest way to accomplish this?  Why, having custom-made whoopie pie pans with your advertisement as a part of your pan, of course!  BRILLIANT!

Cons: May not be any faster, extra washing, builds sides on the cake/cookies, may bake a crust around the pan-sides
A couple issues here.  First, the speed you are able to produce whoopie pies will be limited by the number of pans you have.  Presumably, you won’t have unlimited numbers of pans, so every time you run out, you will have to wash the pans.  This takes time, effort, and water (this is also true if you have unlimited pans, although it wouldn’t impact the rate you put out batches).  Second, scooping and spooning do not really take that much time, so I question if using a pan will really speed up the baking process.  Third, in a pan, you will basically be creating whoopie pies in a cylindrical fashion.  Only you can decide how you feel about edges to your whoopie pies.  Finally, because 2/3 of your edges are in contact with the pan, it is likely you may bake a crust on these sides.  I wonder if this will change the appearance and/or taste of your whoopie pies.

Since I haven’t actually tried these pans, I don’t feel like it would be fair to pass judgement on these pans at this point in time.  I’ll keep this list going, so chime in – what is your opinion on the whoopie pie pan?


The “Almost Breakfast” Whoopie Pies

written by Becky

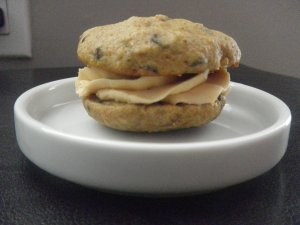
Banana Bread-Chocolate Chip Whoopie Pies with Dulce de Leche Buttercream 

As is usually the case with any banana baking, the plan was to use up the rather brown 3 bananas that I had in the fridge. I had several thoughts of what to do with these inedible rejects including the usual banana bread, healthy banana oat or bran muffins, or of course Banana Whoopie Pies. And I had a mission to fulfill with these bananas: make

something for lab meeting since I was presenting and I like to provide something tasty and home-baked to distract people before I start presenting! In my head, people go easier on you if they are sweetened up a little!

The problem was that that I felt like Whoopie Pies might be a little sweet for a morning lab meeting. But when I realized that I needed to make some dessert to take to a friend’s for dinner on Saturday, I figured I would multi-purpose some Whoopie Pies and just make my lab-mates endure the sweetness at 10:30am. I had thought that I would try to make a more breakfast version by making them banana oat but since they needed to also now be served for dessert, they had to be banana-chocolate instead! But they are made with half whole wheat flour so they are almost breakfast-like!!

As a sidenote, I do realize this is the second Banana Whoopie Pie on this blog but I still needed to try the recipe in the book! Plus, I had to use up those 3 bananas and needed something not too sweet for lab meeting! So it made sense to me!

I mostly followed the recipe from the Whoopie Pie cookbook but changed it enough that I can actually

call it my own! Apparently you need to change 3 things in a recipe to call it your own but I will still comment that I adapted the recipe from this one!

For the filling, I had some Banana Dulce de Leche sauce I had bought awhile back, which I never really knew what to do with but I wanted to try it, and I decided that it would work just mixed into a regular buttercream. It ended up a not very strong flavour but it was the PERFECT texture to pipe!

In the end, I created a delicious cookie that really tasted more like sup

er moist banana bread with a creamy tasty filling! Mmm… it had great reviews. And, the friend that I took these creations to on Saturday night did eat her leftovers for breakfast Sunday, prior to going for a run with me!

Next time, I will try to make this even more breakfast like and make a Banana Oat Whoopie Pie (sans chocolate chips)  with maybe Honey Cream Cheese Filling? Or the Peanut Butter buttercream would be good… or I mentioned a Nutella filling and had people drooling…

PS. sorry to those at work that aren’t in my lab that missed out on sampling these ones! I ran out 😦

Banana Chocolate Chip Whoopie

  • 1 cup all-purpose flour
  • 1 cup whole wheat flour
  • 1 tsp baking soda
  • 1/2 tsp cinnamon
  • 1/2 tsp salt
  • 6 Tb unsalted butter, at room temp
  • 2 Tb shortening
  • 1/2 cup white sugar
  • 1/4 cup brown sugar
  • 1 tsp vanilla
  • 2 large eggs
  • 3 very ripe bananas, mashed
  • 1 cup mini chocolate chips
  1. Line two baking sheets with parchment paper and preheat oven to 350.
  2. Whisk together the two flours, baking soda, cinnamon and salt.
  3. In a stand mixer (or just a bowl with beaters), beat butter, shortening and vanilla until light and creamy. Add the eggs one at a time and beat until well mixed.
  4. Add bananas and beat for about 2 minutes. Beat in dry ingredients with mixer on low just until mixed. Mix in chocolate chips.
  5. Using a spoon or a cookie scoop, portion batter onto baking sheets about 2 inches apart.
  6. Bake 8-10 minutes (depends on your pan and your oven etc) until the cakes look slightly brown and cooked. Allow to cool on baking sheet for a couple minutes before transferring to rack to cool.
As a sidenote, you could use all butter and no shortening, I just happen to have shortening. Plus I have read a few placed that say it makes for lighter, fluffier baking so I thought I would use some. The original recipe actually calls for a 50:50 mix of butter & shortening but I really don’t like shortening.

Dulce de Leche Buttercream

  • 1/2 cup butter, room temp
  • 1 tsp vanilla
  • 1/4 tsp salt
  • 1/4 cup dulce de leche sauce
  • 2 cups icing or confectioners sugar
  • 2-3 tsp water if necessary
Beat butter until creamy. Add vanilla and then sauce. Beat in sugar 1/2 cup at a time. If it is stiff, add water to get a creamy smooth consistency. I honestly don’t remember if this is exactly what I did and really I just dumped the rest of the sauce in that I had but hopefully it should work!

My Favourite Whoopies So Far

written by Becky

Fudgey Chocolate Whoopie Pies with Peanut Butter Filling

Ok, it was back at making Whoopie Pies this week. I had actually made these Whoopie Pies a few weeks ago for something but I had none left to share with several important testers and was afraid if I posted on this recipe that I would be shunned for not bringing in any to share. Especially after I would have raved on about them because they are AMAZING!!

So I am not sure if this is what makes the difference but these cookies have 3 different kinds of chocolate. First some unsweetened & semi-sweet chocolate are melted together with butter, then some cocoa is sifted with the flour. Between this and the 3 eggs (most Whoopie Pie recipes seems to have only 1 or max 2), these Whoopie Pies are super fudgey and thick! Like a brownie really! Although I know they aren’t at all authentic, they sure are tasty (then again I love this flavour combination)!

The first party I took them to was a dinner party at my friends’ place. I also took a Blueberry Lemon Tiramisu (with home made lady fingers). Both desserts were a hit but when I went to leave a little bit early, the four people that were left asked if I could leave the ONLY four Whoopie Pies that were left for them. I had saved two at home for two friends at work but after coming home with none, I ate the other two the next day! Oops. (They were little Whoopies by the way!) I tried a few new things with these guys.

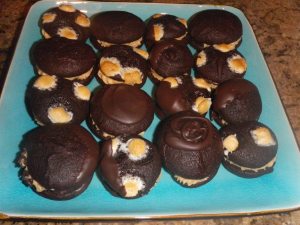
  • First: Marshmallows. Only because I was asked to incorporate marshmallows into my dessert from a friend currently addicted to the little sugar bombs did they get this decor. I wasn’t sure how they would be so I didn’t do it to all.
  • Second: Piping the cookies. These ones were just done with a piping bag with no tip. It worked well to pipe them and the finished products are perfect little circles! Even more perfect than using a cookie scoop!

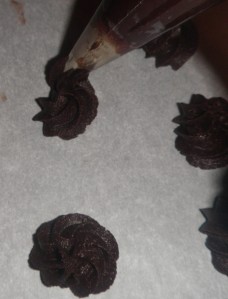
I also piped the delicious (although quite stiff) filling (this is pretty usual) to make lovely little designs, which just got smushed between the cookies!

The third new trial thing (may as well just try everything in one batch!) was to dip some of the Whoopie Pies in chocolate. I didn’t fully enrobe any in chocolate but instead just dipped some in about 1/3 of the way or I drizzled the top with chocolate (I just used dark melting wafers).

Some were also left unadorned. They were a huge hit and I knew this was one of my favourite Whoopie Pies! The cookies are super fudgey and rich and chewy while the filling has a good amount of peanut butter kick! And I loved the ones dipped in a bit of chocolate!

So this was the first batch I made. I made a second batch in honour of the Royal Wedding. Honestly, none of us at work really cared about the wedding but we did think it was a great excuse for a fun tea party complete with fascinators and mini foods! I figured this was my excuse to make this delicious concoction again – as well as use the other half of the peanut butter frosting that I had stored in the freezer.

I didn’t add anything extra but I did pipe the cookies with one of my new (1M I think) piping tips! Don’t they look lovely?


Fudgey Chocolate Whoopie Pies with Peanut Butter Buttercream (adapted from the Food Network Kitchens)

Ingredients

  • 2 ounces unsweetened chocolate, chopped
  • 4 ounces semisweet chocolate, chopped
  • 1/2 cup unsalted butter
  • 1 cup sugar
  • 3 large eggs
  • 1 teaspoon pure vanilla extract
  • 1 cup all-purpose flour
  • 1/4 cup  cocoa powder
  • 1/2 teaspoons baking powder
  • 1/2 teaspoon salt

Directions

  1. Preheat oven to 375 degrees F. Use parchment paper to line a couple baking sheets.
  2. Melt the unsweetened and semisweet chocolates with the butter in a medium microwave-safe bowl. Heat at 75% power until the butter is mostly melted and the chocolate is starting to soften around the edges (about 2 minutes). Stir and continue heating at 60% stirring every 30 seconds until the chocolate is smooth & melted. Cool at room temp about 5 minutes.
  3. Whisk in the sugar, eggs and vanilla into the chocolate mixture.
  4. In another bowl, whisk together the flour, cocoa, baking powder and salt. In three batches, add the dry ingredients to the wet ingredients & mix until moistened. Don’t overmix.
  5. Use a small cookie scoop, a piping bag or spoon to portion batter onto the prepared pan. These are pretty rich so you may not want to make giant ones! Space the cookies about 1-inch apart. They don’t spread much. Bake 6 minutes. They should look moist still but not wet and should  spring back when lightly touched.

Peanut Butter Buttercream Filling:

  • 1 cup smooth peanut butter (not natural)
  • 1/2 cup butter, softened
  • 2 cup icing or confectioner’s sugar
  • 3 Tb (or more) whipping cream
  • 1 tsp vanilla
Beat together peanut butter & butter. Add 1/2 cup at a time of the icing sugar until stiff. Add whipping cream & vanilla. You may need to add more whipping cream (milk would also work fine but I had whipping cream from something else) to get the desired consistency.
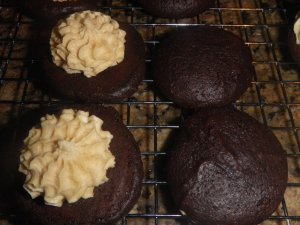
Use a small cookie scoop, a piping bag, a small spatula, or a spoon to add a dallop of the filling to the inside of half of your Whoopie Pies. Smush together with the other side for an amazingly delicious Whoopie Pie!

Where did all the Whoopie Go?

written by Becky

Red Wine Cupcakes with Blackberry-Reduced Wine Icing

I have a confession, I have been neglecting making Whoopies (I so wanted to write “makin’ Whoopie” without pluralizing it as I knew it would be more amusing but… well I am referring to the cookies and nothing further). There are two reasons for this neglect. First, I have discovered a problem with having a Whoopie Pie blog and it is not running out of things to say about them, as was suggested might happen, but rather I feel like I can’t bake everything else I love to bake. Second, I have been taking a cake decorating course for the past month and so have been force to bake sugar cookies, a cake, cupcakes and then another cake. Even though I do have a sweet tooth, eating Whoopies on top of all of these things is a lot of sugar!
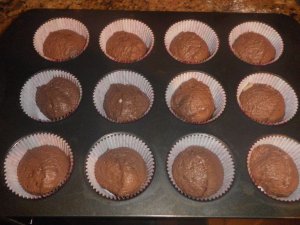
So here is the solution: a new addition to Let’s Make Whoopie – a place for other baking done by Courteney or I!

And since I previously had mentioned the red wine cupcakes in the Guinness Whoopie Pie post, I figured that was a good place to start – I would get to try what sounded like a delicious recipe, and I would make the required cupcakes for my class.

Although I have never heard about these interesting culinary concoctions, I discovered that there are actually several red wine cupcake recipes out there, some have a lot of chocolate, some have a little chocolate, and some have none. Of course the amount of red wine in the recipes differ as well and the frostings vary from a condensed milk glaze to a port wine buttercream to a blackberry wine buttercream to a chocolate ganache frosting. Since I was hoping to be able to taste the wine, I figured I would stay away from the super-chocolatey ones but since chocolate and red wine pair well together to follow a recipe with at least some chocolate. Furthermore, this recipe was shown with the blackberry-wine buttercream and I thought that sounded FANTASTIC. Here is the recipe. I used a Cabernet Sauvignon for both the cupcakes and the icing since it is what I had.

I should add that unlike the beer batter Whoopies, the batter for these were delicious. It was creamy and smooth and so so good. And you can see that they baked up nice as well! Look how much they rose and how perfectly rounded they are! They also smelled good – not really chocolatey or vanilla-y like most baked items but sweet and comforting.

As a sidenote, it occurred to me when I was using my giant “cookie” scoop that I mentioned in the post about size that using the big one meant that one “American Sized” Whoopie Pie is actually equivalent to TWO cupcakes (with less icing of course). That is a lot of Whoopie!

Because my cake decorating class was teaching us how to fill cupcakes as well, I figured that was a good excuse to fill these guys with a chocolate ganache filling. I just did the basic ganache: heat 1/2 cup of whipping cream until it bubbles around the edge then pour that over 4 ounces of semi-sweet chocolate. Wait about 2-3 minutes and then stir until it is nice and smooth (of course it looks kind of nasty first – like the picture). Oh and then I added about a tablespoon of seedless raspberry jam. I should point out that I originally thought I would do a whipped ganache – basically just whip it after it has cooled in the fridge to add more airiness  – but when I went to pipe this into the middle of the cupcakes it was way too hard so I melted it in the microwave for 15 seconds and it became liquid! Oh well, still piped that way.

So after piping in the filling, it was time to decorate! First a layer of the blackberry – wine frosting (for those interested, I was originally disappointed as I didn’t feel like there was enough flavour to it but then decided I did quite like it) and then some fun decorating. Since we were learning different techniques, I decided to just try them all – hence all the random different types! I kind of like the whimsical look of them! In the end, I liked these cupcakes a lot. The red wine flavour isn’t strong but there is something familiar about it that makes them tasty. The texture is good and moist although somewhat dense. I loved the chocolate ganache filling with it too! So all in all, a success, even if they weren’t Whoopie Pies!

I don’t really know which is my favourite – either the one below (a Shaggy Mum) or the pretty pink icing with the yellow flowers & leaves (I love piping leaves)! It was fun to take them to work to see which one people picked as their cupcake of choice!


Challenge: Sucrose-free Whoopie Pies

Written by Courteney

The Challenge: To modify a whoopie pie recipe so as not to use granulated OR icing sugar.

The Backstory: One of my friends/co-workers is, unfortunately, allergic to both fruit sugars (fructose) and ‘normal’ sugar (i.e. granulated sugar).  I know.  A little bit tragic – I don’t know how she survives.  However, she’s always interested in what baking adventures Becky and I have/are embarking on, and was one of the first readers of our blog.  So I decided that a fun challenge would be to try to modify a whoopie pie recipe so that she, too, could enjoy the experience that is the Whoopie Pie.

My friend is a huge fan of peanut butter, so I decided to make classic chocolate whoopies with salty peanut butter icing, from the book Whoopie Pies by Sarah Billingsley & Amy Treadwell.  I’ve posted my modified recipe after the break, for those of you who are interested.

Since my friend is allergic to sucrose, she suggested I substitute dextrose, which is another type of sugar with slightly different chemical structure, which she usually uses in her baking instead of granulated sugar.  It’s found in the bulk food section of some grocery stores (i.e. Save-on Foods) and is of a slightly different texture than granulated sugar.  It’s definitely not granular, but more powdery, like icing sugar.

Dextrose from the bulk food section (picture taken at the mouth of the bag)

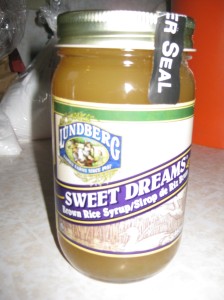
Since dextrose is not very sweet, my friend suggested using rice syrup as a sweetener, which she can eat and has a consistency a little like honey.

Rice syrup, available from Whole Foods. It kind of reminds me of alfalfa honey.

If a recipe calls for, say, 1 cup of sugar, she usually substitutes 1/2 cup of rice syrup, and 1/2 cup of dextrose – this provides the bulk that granulated sugar gives to a recipe, as well as a little sweetness, although it’s nowhere near the sweetness of regular sugar.  This conversion was my starting point.

I accidentally over-thawed my butter (I forgot to take it out of the freezer earlier, so to ‘soften’ it to ‘room temperature’, I stuck it in the microwave.  It promptly melted), which probably contributed to the liquid-y-ness that I found (I’ll discuss this more later).  But here’s a picture that gives a better idea of what rice syrup is like – it’s the beige-coloured viscous liquid just above/on the white dextrose.

This gives a better idea of what the rice syrup looks like. Taken pre-mixing of the butter (melted, yellow), shortening, dextrose (white), and rice syrup (beige-coloured trickles above the dextrose)

I found that when I did a strict substitution of 1/2 cup of rice syrup and dextrose, each, for 1 cup of brown sugar, the outcome was very liquid.  On the right, you’ll see my cookie sheet pre-baking, and below, post-baking:

Pre-baked

Post-baked

As you can see, there was some serious spreading occurring.  I quickly went back and added another 1/4 cup of dextrose and about 1/3+1/4 cup (=7/12 cup?) of flour to soak up the excess liquid.  My second attempt looked something like this, which I judged to be more whoopie pie-like:

MUCH better!!

The icing was very simple and delicious – I really liked that the salt brought out the peanut butter flavour and gave it a different, sharper taste.  For the icing, I instead of 3/4 cup of confectioner’s sugar, I used 1/4 cup of rice syrup (for sweetness) and about 3/4 cup of dextrose.  It ended up being a teeny bit dry and difficult to pipe (I burst a hole in my makeshift icing bag trying to ice these!) so maybe next time I’ll decrease the amount of dextrose I added.  YUM!

How simply delicious!

Continue reading