Finally, I tried a “Real” Whoopie Pie.

Yes, you read the title correctly, I am saying this was my first “real” Whoopie Pie. I say that because it actually came from somewhere besides my kitchen. Although I do make excellent Whoopie Pies (am I allowed to say that?) I still had yet to actually have one that wasn’t made by me! So really I wasn’t all that sure that I was even making them “traditionally” or if I was anywhere near the right texture etc. I should add, that I have had 1/2 of a Starbucks Red Velvet Whoopie Pie… and I wasn’t that impressed.

Portion control 🙂

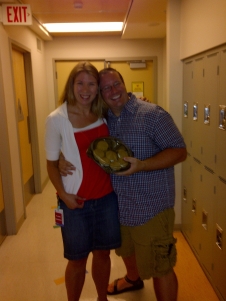
Anyways, thanks to my friend, I was able to try a “Pumpkin Wicked Whoopie Pie” from a grocery store just south of the border and not far from us. My first impression was “yep, it is HUGE!!” In my post on sizing options for Whoopie Pies, I had said the following thing about the largest size: “Man-sized”, “Shareable Size” or “American Sized”. Now I don’t mean the last name as a slam on Americans – I am just pointing out that this is the size that is sold in the States and shown in every picture I have seen of someone eating a Whoopie Pie. Without going to the other post, I will point out that this “Man-sized” Whoopie is the size of a hamburger! Seriously! I cut this one in half and still found that to be a lot for one sitting. I somehow did ‘manage’ to get through it though 🙂

These were good, moist enough and nice and cakey but maybe not quite pumpkin’y enough! We shall see if I can do better with my pumpkin Whoopie Pies that will be made & posted shortly!


Cookies and Cream Whoopie Pies

I first want to start this post with a BIG welcome to new subscribers! I love it when someone new joins & there have been quite a few lately! Yay! 🙂

Cookies & Cream Whoopie Pies

Ok, now on to the post. As a child, my first choice of ice cream was ALWAYS cookies & cream. It was just the perfect combination of chocolate and vanilla. I like the texture: a little crunch contrasting perfectly with the cold, creamy ice cream. Also, it wasn’t too crazy of a flavour – and it didn’t make your mouth blue like a lot of other people’s favourite flavour: Bubble Gum (I also really didn’t like getting the chunks of gum in there because it was so confusing – are you chewing gum or eating ice cream?). Oddly enough, it is now very rare for me to get cookies & cream ice cream even though I do still think it is delicious.

My friend filling the Whoopies!

So that was the inspiration for these Whoopie Pies that I made with my friend for her family dinner. They turned out great and were definitely reminiscent of the ice cream. We used the chocolate whoopie recipe from Martha Stewart’s Cookies booksince it required buttermilk & we didn’t have any whole milk as other recipes required. This time I was pretty happy with this recipe. It is quite moist and chocolatey. I still need to do more direct comparison’s of the chocolate whoopie to find the one that is my favourite but this one is definitely good. I do recommend that you don’t underbake them at all. The first cookie sheet I underbaked by accident and they fell flat after. They tasted good still but did not look pretty.

Chocolate Whoopie Pies

(these make roughly 3 dozen medium sized ones – half it if you want less)

  • Making the batter

    3 1/2 cup flour

  • 1 1/2 cup cocoa
  • 1 Tb baking soda
  • 1 tsp baking powder
  • 1 tsp salt
  • 1 cup butter, room temp
  • 2 cups sugar
  • 2 eggs
  • 2 cups buttermilk, room temp
  • 2 tsp vanilla
  1. Preheat oven to 400°F. Line two baking sheets with parchment paper.
  2. In the bowl of a stand mixer (or a regular bowl and use a hand mixer), beat the butter 1-2 minutes until fluffy. Add the sugar and beat another 2-3 minutes until light. Add the eggs, one at a time, and continue to beat. Add the vanilla.
  3. In a separate bowl, whisk together the flour, cocoa, baking soda, baking powder and salt.
  4. Add the dry ingredients alternatively with the buttermilk (so add flour mix, buttermilk, flour mix, the rest of the buttermilk, and then the rest of the flour mix).
  5. Spoon, scoop, or pipe about 2 tablespoons per cookie onto the baking sheet. Bake until they hold their shape when you press lightly on them (a finger print should not remain!) – about 8 minutes.
  6. Allow to cool 2 minutes on the baking sheet and then transfer to a rack to cool completely.
  7. When they are cooled, fill them with the filling below (I like a 2:1 ratio so if you use 2 tablespoons per cookie, use 2 tablespoons of filling – a cookie scoop is great for this). If you want, roll them in cookie crumbs!

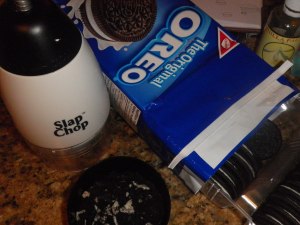
Breaking Oreos! I used my Slap Chop...

Cookies and Cream Filling

  • 1 cup butter, room temp
  • 4 cups icing/confectioner’s sugar
  • 1 tsp vanilla
  • 2-4 tsp cream/milk/water to get a good consistency
  • 8-10 Oreos, chopped into smallish pieces
  1. Beat the butter 3-4 minutes until light and fluffy. Add the sugar half a cup at a time & continue to beat on low. Add the vanilla and cream/milk. Beat on high for 2 minutes after.
  2. Stir in the Oreos.
written by Becky

Oreo Filling - stirring it up!

Finishing up: after filling them, we rolled them in more Oreo crumbs (optional)


Caramel Macchiato Whoopie Pies

written by Becky

Caramel Macchiato Whoopie Pies

So good… these are. They were also sort of an accident: the plan was just vanilla caramel. As part of the wedding that I made these cupcakes for, I also made a few small desserts for the dessert table and I definitely knew I needed to make Whoopie Pies! Since I was making a BIG batch and I invited my friend over to just hang out with me while I baked. Well, of course when they were done baking, we had to try them and although I had some homemade caramel, the only icing I had was coffee flavoured (I was making the cookies one night and freezing them for a few days – until the day before the wedding when I made the icing and filled them). So, a little caramel plus the  coffee icing and voila: a Caramel Macchiato Whoopie Pie! And since the trial version turned out so well, I decided to change the plan for the wedding Whoopies!

Brown Sugar Whoopie Pies
adapted from Reverse Classic Whoopies in Whoopies!

  • 1/2 cup butter, room temp
  • 1 cup packed brown sugar
  • 1 tsp vanilla
  • 1 tsp caramel flavour (don’t worry if you don’t have it! I did so I used it!)
  • 1 large egg
  • 2 1/3 cup flour
  • 1 1/4 tsp baking soda
  • pinch salt
  • 1 cup buttermilk
  1. Preheat oven to 375°F. Line 2 baking sheets with parchment paper.
  2. Beat butter for 2-3 minutes until light and fluffy. Add sugar and continue to beat another 2-3 minutes. Add the extracts and the egg and beat.
  3. Whisk together the flour, baking soda and salt.
  4. Add the dry ingredients alternatively with the buttermilk to the butter/sugar/egg mix and beat until combined.
  5. Pipe/scoop/spoon batter onto the prepared baking pans. I piped mine with a 1M tip and got sort of flower shaped whoopies. Use whatever tool you want but just remember approximately how much batter you use per cookie as it seems to work well to use the same amount of filling.
  6. Bake 9-11 min until the whoopies bounce back when lightly pressed. Allow to cool a couple minutes before transferring to a cooling rack to cool completely.

Homemade Caramel!

Caramel
From Martha Stewart’s Cupcakes book . Note: you will have more than you need but it is AMAZING to put on ice cream, in cake, or use it to make a delicious caramel icing!
Of course you could always just buy pre-made caramel. It doesn’t taste nearly as good but it is much less effort!

  •  2 1/2 cups sugar
  • 2/3 cup water
  • 1 Tb corn syrup
  • 3/4 cup whipping/heavy cream
  • 1 tsp salt
  1. Put sugar, water and corn syrup in a medium saucepan. Heat over high heat stirring occasionally until sugar is dissolved and syrup is clear.
  2. Clip a candy thermometer to the side of the pan and continue to cook without stirring. If needed (if you see sugar crystals on the side of the pan), brush down sides of the pan with a wet pastry brush.
  3. Boil, gently swirling pan occasionally, until the mixture turns a caramel colour and the termperature JUST reaches 360°F (I tend to take mine off at about 350-355°F as it continues to hold a lot of heat for a couple minutes and I fear burning it!)
  4. Remove from heat and slowly pour in cream. Be careful – it spatters and bubbles! Stir with a wooden spoon continuously until smooth. Stir in salt.
  5. Allow to cool to room temp. I like to keep mine in a glass jar in the fridge but then it frequently gets too solid for easy spreading. If you find that it is too hard, you can soften it by putting it in the microwave for 10 seconds at a time (or just remove it from the fridge a couple hours before using it).

Coffee Icing

  • 1 cup butter, room temp
  • 1-2 Tb espresso powder (make it to how strong you like it!)
  • 1 tsp vanilla
  • 4 cups icing sugar
  • 2-4 tsp milk/cream/water to thin consistency icing
  1. Beat the butter until creamy and light (at least 3 minutes). Add in the flavourings.
  2. Add 2-3 cups of the sugar 1 cup at a time. Add a bit of liquid. Beat in the rest of the sugar. Add more liquid as needed.

Assembly Line! Caramel on one side, coffee icing on the other!

Assembly

  1. Line up Whoopies – find two Whoopies of a similar size & shape to pair together.
  2. Spread caramel on one half of each of the Whoopies and pipe/scoop icing onto the other side. Use approximately the same amount of filling as you used of batter for the cookies.
  3. Smoosh together the two sides and place onto serving dish (or into storage container) CARAMEL SIDE UP. This is important as I was originally putting them the other way and they were sliding apart. The caramel on the bottom does not provide enough friction and the coffee icing and the top cookies slides off!


Loco for Coconut Whoopie Pies

written by Becky

Loco for Coconut Whoopie Pies

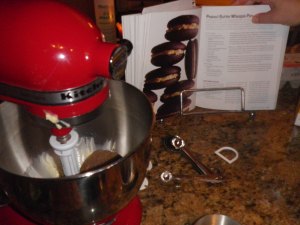
A good friend of mine recently was asked to bring dessert for a family lunch and decided that it was time for her family to try Whoopie Pies. So she called me up (actually she texted me… almost the same thing, right?) and asked if we could make them together, at my place so that we could use my fabulous Kitchenaid mixer! Of course this sounded like an excellent night of baking to me! But then it was the dilemma of flavours. She knew it had to be pleasing to kids so I suggested Peanut Butter & Jam, Classic Chocolate with Marshmallow, Neapolitan, lemon and other such classic flavours. After a bit more text-discussion, my friend decided she really needed to do two flavours: one being coconut (both her mom and Grandma LOVE coconut) and then a chocolate-y kids type one. I suggested Cookies-and-Cream with Oreo pieces in the batter and we had our decision! Of course the Cookies & Cream Whoopie Pies will be in a separate post.

Coconut is one of those flavours that people either love or hate. As with many flavours, I hated it as a kid but love it now. In fact I really hated it until I started loving Pina Coladas! Even weirder than that I loved these drinks (virgin ones as a kid in Mexico and now of course with the tasty rum added) despite the flavour of coconut is that I actually hated (and still do) pineapple! So I hated coconut and I hated pineapple but for whatever reason you put the two together and get deliciousness! (As a sidenote, Pina Colada Whoopie Pies will have to make an appearance on here at some point!)

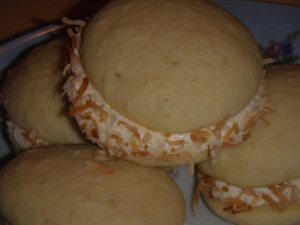
So since we were making these creations for definite coconut lovers, we figured we would go crazy with the coconut: coconut milk, unsweetened coconut and coconut extract in the batter, all three also go into the icing, and the outside is rolled in toasted coconut. The toasted coconut was the kicker! Added a little crunch to the outside and the taste of it was amazing!

Enjoy!

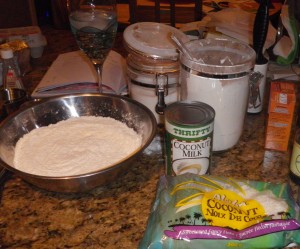
Ingredients!

Coconut Whoopie Pies

  • 1/2 cup butter, room temp
  • 1 cup white sugar
  • 1 tsp vanilla
  • 1 tsp coconut extract
  • 1large  egg
  • 2 1/3 cup flour
  • 1 1/4 tsp baking soda
  • pinch of salt
  • 1/3 cup coconut milk
  • 2/3 cup buttermilk
  • 1/2 cup unsweetened shredded coconut (fine is best but medium shred should be fine)
  1. Preheat oven to 375°F. Line 2 baking sheets with parchment paper.
  2. In the bowl of a stand mixer, beat the butter for about 1-2 minutes until fluffy. Add the sugar and beat another 2-3 minutes until fluffy and light. Add the egg and then the extracts.
  3. In a separate bowl, whisk together the flour, baking soda and salt.
  4. In a measuring cup, measure the two milks together and stir.
  5. Prebaked & baked! My friend brought her Silpat liner, which I had been interested in trying!

    With the mixer on low and allowing to mix between each addition, add about 1/3 of the flour mix, 1/2 of the milk mix, another 1/3 of the flour mix, the rest of the milk, and finally the rest of the flour.

  6. Mix in the shredded coconut.
  7. Spoon or scoop batter (about 1 tablespoon per cookie) onto the prepared cookie sheets.
  8. Bake 10-12 minutes or until the spring back when lightly touched (they shouldn’t start to turn brown). Allow to cool a few minutes on the sheet and then transfer to a rack to cool completely.

Whoopie Shells - awaiting their filling!

Creamy Coconut Filling

  • 1/4 cup butter, room temp
  • 1 3/4 cup icing sugar
  • 3 tablespoons sweetened shredded coconut
  • 2 tablespoons unsweetened shredded coconut
  • 3 tablespoons coconut milk
  • 1/2 tsp vanilla
  • 1/2 tsp coconut extract
  1. Beat the butter for 2 minutes. Add the sugar and beat until well combined.
  2. Add the rest of the ingredients and beat until smooth, about 5 minutes.

1/2 cup medium shred sweetened coconut, toasted
Be careful when toasting it not to burn it! You just want it lightly browned!

Assembly

Rollin' in the delicious toasted coconut!

  1. Find matching sides for each Whoopie Pie – you want your top & bottom to match!
  2. Scoop filling onto what will be the bottom of your Whoopie Pie. The amount of icing should be the same volume as you used for your cookies – so if you used 1 tablespoon then, use the same amount.
  3. Squish the top on but don’t push so hard that the filling oozes out!
  4. Roll the outside edge in the toasted coconut – you may need to actually pick up some of the coconut and place it along the edge.
  5. Indulge in Coconut Goodness!

Amazing Coconut Whoopie Pies!


Apple Pie a la Mode Whoopie Pies!

written by Becky

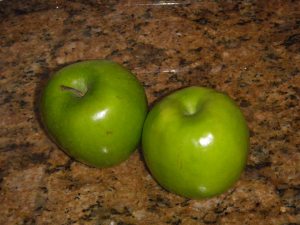
Mmm... Granny Smiths!

Well it has been a LONG time since my last post. Between just the craziness of life and going away to the Mediterranean for two weeks, I haven’t had a chance to post anything! But now I have four – yep, FOUR, Whoopie Pie recipes that need to be posted! I guess that is what I get for getting behind. So my plan is one a week for October and then I get to make new (& seasonal ones) for November. This is actually probably a good thing since I have been enjoying desserts (and food in general) way too much! It is nice to have amazing cruise food and trying great food in Italy, Greece, Turkey & Spain, it is likely a good idea to take a little break from baking as much!

For those that wonder, yes I did have A LOT of gelato in Italy (and actually Barcelona & Greece for that matter). Oh and we even tried Turkish ice cream – it was really NOT good. But the pasta was amazing in Italy and the Baklava was incredible in Greece! Mmm… oh so good.

Anyways, on to this post! Since it is BC apple season, I figured I would go with posting the Apple Pie Whoopie Pies. I filled them with a creamy vanilla-bean buttercream as the “a la mode” part of the pie! Also, since my favourite apple pies have a crumble topping rather than a second layer of crust, I added some crumble to the top of half of the Whoopie Pies. Although next time I would definitely add more apples (the recipe I was sort of following said 2 grated apples – I grated one and chopped the other but next time I would add 2 chopped as well as the grated one), I think they turned out pretty good and did have a good resemblance to apple pie.

Apple Pie Whoopie Pies

  • 2 peeled apples – 1 grated, 1 chopped (I would add a 2nd chopped next time but I didn’t this time): after grating and chopping, mix with 1/2 tsp lemon juice to keep the apples from going brown
  • The batter & the crumble

    1/2 cup butter, room temp

  • 1 cup white sugar
  • 1 tsp vanilla
  • 1 large egg
  • 2 1/3 cup flour
  • 2 1/2 tsp baking powder
  • 1 tsp Poudre Douce (or pumpkin pie spice or any combo of that kind of spice)
  • 1/2 tsp cinnamon
  • pinch salt
  1. Preheat oven to 375F. Line baking sheets with parchment paper.
  2. Beat the butter until creamy. Add the sugar and continue to beat until light and fluffy. Beat in the egg and then the vanilla.
  3. Whisk together the flour, baking powder, spices and salt in a separate bowl.
  4. With the mixer on low, slowly beat in the dry ingredients. The batter ends up quite thick. Add the apple – it will then still be thick but much more workable.
  5. Scoop the batter (about 1 tablespoon per whoopie if you don’t have a scoop!) onto  the prepared baking sheets. On half of the cookies, press about 1 tsp of the crumble (recipe below) into the top. Don’t squish the cookie but ensure it is going to stick to it.
  6. Bake 10-12 minutes or until firm to the touch. After cooling a few minutes on the baking sheet, move to a wire rack to cool completely.

Unbaked Whoopies: tops on the left with crumble on top

Baked Whoopies: Tops on the left still!

Crumble Topping
  • 1/4 cup butter, room temp
  • 1/2 cup flour
  • 1/4 cup oats
  • 1/2 tsp Poudre Douce (or pumpkin pie spice or any combo of that kind of spice)
  • 1/4 tsp cinnamon
Mix all ingredients until crumbly. If it doesn’t look like loose crumbs (see picture above), add more flour.
Vanilla “a la mode” Filling
  • 3/4 cup butter, room temp
  • 1 vanilla bean, scraped (or 2 tsp vanilla)
  • 3 cups icing sugar
  • 1-2 Tb cream (or milk)
  1. Beat butter until light and creamy. Add vanilla bean.
  2. Add sugar 1/2 cup at a time.
  3. Add cream (or milk) until it is a medium consistency: not too thick but not too thin!
Assembly
  1. Apple Pie a la mode Whoopie Pies

    Find two cookies of approximately the same size: make sure one is a “top” with crumble and one is a “bottom” with no crumble.

  2. Scoop filling (I use the same scoop I use to make the cookies so approximately 1 tablespoon) onto the bottom cookie.
  3. Put the top on! Smoosh down a little and enjoy!

Black Forest Whoopie Pies

written by Becky

Black Forest Whoopie Pies

When I made the Vanilla Blueberry Cream Whoopie Pies, did I mention that as a child I never liked blueberries? I am pretty sure I did… the other fruit that I disliked as a child was cherries. It took me a very long time to decide that I actually do like fresh, delicious cherries. In fact, maybe it was after I moved to BC that I realized how great fresh Okanagan cherries are. Even in saying that I now love them, I still absolutely despise cherry pies, maraschino cherries, and Black Forest cake. Yes, I do realize I added “Black Forest” cake and that I have titled this post as Black Forest Whoopie Pies. I have generally stayed away from the cake because I assume that I don’t like it no matter what because they usually use sour cherries and I think I have figured out that it is these that I really don’t like. Sour cherries and cooked cherries. I don’t know why they taste so bad cooked but I love them fresh and hate them cooked. (And don’t you dare ever offer me one of those NASTY cherry cordial chocolates! I seriously may gag!) Incidentally, blueberries used to be opposite: I loved them cooked, like in a pie, but hated them fresh. Now I love all forms of blueberries but that is NOT true for cherries. Anyways, point of all of this is that for August’s Bake it Seasonal, the fruit was cherries so I had to come up with a Whoopie Pie recipe using cherries!

I used fresh cherries (thankfully the season went late this year and I could still get the BC berries up until this week), and whipping cream for the filling and chocolate Whoopie Pies for the cakes. Each of the pieces were delicious on their own… fresh cherries, soft whipped cream, fresh baked chocolate Whoopie Pies… unfortunately I still don’t like Black Forest! Even with uncooked cherries! I really always thought that I just didn’t like it because the cooked stuff and the Kirsch. So for true taste tests, I’ll have to see what my co-workers think! I do believe that if you like Black Forest, you will like these! I still enjoyed picking the cherries out and eating them just on their own and then eating the cake and cream together. I wonder what it is that my taste buds reject so much about the combination? I wanted to really like these…

Black Forest Whoopie Pies

Chocolate Whoopies
(adapted from Whoopies! I mostly followed the recipe but ran out of buttermilk so added sour cream instead… and then had to compensate with a second egg to make up for the drier texture.)

  • The batter

    1/2 cup butter, room temp

  • 1 cup brown sugar, packed
  • 1 tsp vanilla
  • 2 eggs
  • 2 cups flour
  • 1/2 cup cocoa
  • 1 1/4 tsp baking soda
  • pinch of salt
  • 1/2 cup buttermilk
  • 1/2 cup sour cream
  1. The cookies

    Preheat oven to 375°F. Line a couple baking sheets with parchment paper.

  2. In a mixer, beat the butter, sugar and vanilla until fluffy & light – a couple minutes. Add the two eggs and beat well.
  3. In a separate bowl, whisk together the flour, cocoa, baking soda and salt.
  4. In a measuring cup, mix together the buttermilk and sour cream.
  5. Add the dry mix alternating with the buttermilk mixture to the butter/sugar/egg. Beat  after each addition and make sure you start and end with the dry ingredients.
  6. Spoon, scoop or pipe the batter onto the baking sheets. I used my 1.5 inch cookie scoop which makes medium sized whoopies that are likely about 1.5 Tb each.
  7. Bake 10-11 minutes or until they bounce completely back when lightly touched.
  8. Allow to cool a couple minutes on the sheet before removing to a rack to completely cool
Whipped Cream
  • 2 cups whipping cream
  • 1/2 cup icing sugar
  • Whip It (optional)
  1. Beat whipping cream and Whip It (this is just a stabilizer –  I had it so I used it) until soft peaks form.
  2. Add the sugar and beat a minute or so longer but not until stiff.

The assembly

Cherries 

  • 2 cups fresh cherries, pitted & chopped
AssemblyPut a small mound of cherries on what will be the bottom half of your Whoopie.
  1. Scoop a mound of whipped cream on top.
  2. Squish with the top half of your Whoopie.
  3. Eat! I hope you like it better than me! 🙂

S’mores Whoopie Pies

written by Becky

S'mores Whoopie Pies!

It seems that summer should never pass by without enjoying at least one S’more. Somehow it is just part of summer. Between the gooey marshmallow, the melted chocolate and the crispy honey-like graham crackers, the sweet makes for perfect camping treats!

Only one problem though, I am really not much of a camper. I like the idea of being outdoors and enjoying the simpler life but in reality I like to be able to have a shower daily (a clean lake to swim in will do though), I like to not be covered in mosquito bites, I don’t like hot dogs, and although I really hate outhouses, I require at least that (no peeing in the bush for me)!! Additionally, I don’t have all the gear and so the idea of trying to get organized enough to actually go on a camping trip seems exhausting. I used to enjoy going along with my friend’s family when I was in high school but they would always go somewhere with flushing outhouses, a beautiful lake, and they would do all the prep work in their camper van! When I was even younger than that, we had a tent trailer and that was fun. Again, flushing toilets, lakes to swim in and someone else organizing… so as you might guess, I don’t always get my campfire S’mores.

Enter the S’mores Whoopie Pies. I made this on August 10th – this is important because S’mores day is always on August 10th! I needed to make some Whoopie Pies for a friend I was seeing that had NEVER had a Whoopie Pie and I had recently read about S’mores Day on someone else’s blog  so I figured I may as well take advantage of it and make some S’mores Whoopie Pies!

Ready for delivery.

The Whoopies are made with graham flour (this is difficult to find but Bob’s Red Mill sells it and I had previously bought to make S’mores cupcakes). It is a tasty flour that has a coarse texture because the bran and the germ of the wheat is ground separately and more coarse than the endosperm of the wheat. For more info see Wikipedia! That is where I just learned about graham flour! Ok, so next we have some chocolate ganache… mmm. And finally I made some toasted marshmallow filling! And voila, a S’mores Whoopie Pie! Oh, and if I can just brag a little – mine looked better than the ones in the book 🙂

Prep work

Graham Cracker Whoopie (from Whoopie Pies by Sarah Billingsley & Amy Treadwell)

  • 1 1/2 cup graham flour
  • 3/4 cup all-purpose flour
  • 1 1/2 tsp baking powder
  • 1/2 tsp salt
  • 1/2 cup butter, room temp
  • 1 cup packed brown sugar
  • 2 eggs
  • 1/2 cup buttermilk
  • 2 Tb milk
  • 1 tsp baking soda
  • 1 tsp white vinegar
  • 1 tsp vanilla
  1. Preheat oven to 375°F and line baking sheets with parchment paper.
  2. Whisk together flours, baking powder and salt.
  3. With a mixer (hand or stand), beat together butter & brown sugar until light & creamy – about 3 minute.s Add the eggs, one at a time. Add the buttermilk and vanilla.
  4. In a small bowl, mix the milk, baking soda & white vinegar (it should foam!).
  5. Add half of the flour mix to the batter, then the milk-foam, then the rest of the flour. Beat on medium about 2 minutes until totally combined.
  6. Drop, pipe or scoop the batter onto the sheet spacing the Whoopies a couple inches apart. I used my 1.5 oz scoop and they were a lovely size and make perfectly circular Whoopies!
  7. Bake 8-10 minutes or until the Whoopies bounce back when lightly pressed. Remove from oven and allow to cool for 3-4 minutes before moving to a rack to cool completely.
Chocolate Ganache
  • 1/2 cup whipping (heavy) cream
  • 4 oz semi-sweet chocolate, in small’ish pieces
  1. Heat cream in a small saucepan until it starts to bubble around the edges. Don’t boil it!
  2. Pour hot cream over chocolate in a bowl. Leave for a couple minutes and then stir. Continue stirring until it becomes smooth and delicious!

Toasty Marshmallows

Roasted Marshmallow Filling

  • 2 cups mini marshmallows
  • 1/2 cup butter, room temp
  • 1 tsp vanilla (preferably clear)
  • 2 1/2 cups icing/confectioner’s sugar
  1. Lightly grease a baking sheet with butter. Spread marshmallows in a single layer and place under broiler. WATCH CLOSELY! Remove from oven as soon as it starts to brown! Remember what happens when you overcook marshmallows? They burn and are nasty!
  2. Allow to cool slightly.
  3. In the bowl of a mixer, beat butter. Add marshmallows and continue to beat until smooth. Add vanilla. Beat in sugar. Depending on how soft your butter is, this may be too soft still. You can either add more sugar or put the mix into the fridge. I don’t like it being too sweet so I let it cool some.

A double sided Whoopie Pie lineup! Marshmallow on one side, chocolate ganache on the other.

Assembly

  1. Pair up Whoopies so that the tops and bottoms are roughly the same size.
  2. Spoon chocolate ganache on one side of the Whoopies.
  3. Scoop/spoon marshmallow filling on the other side.
  4. Sandwich together the two Whoopies! Squish slightly to evenly distribute the fillings!
  5. Mmm… enjoy!

S'mores Whoopie Pies... I'd like s'more please!

The satisfied customer 🙂


The Search for Courteney (aka Mint Chocolate Baileys Chocolate Mint Whoopie Pies)

Written by Courteney


While I am fully aware that putting my name in the title of a blog post is (a) incredibly conceited, and (b) completely irrelevant to the topic of this post, I felt that the occasion of my months-long absence from this blog required some sort of acknowledgment.  That, and maybe Becky will stop bugging me to churn out this post I’ve been holding on to. (Just kidding!)

A few months ago, a two friends and I decided to celebrate the end of the school year by having a girls’ Hockey and Baking night.  The original plan was to bake whoopie pies while watching the hockey game (it was the San Jose Sharks vs. the Vancouver Canucks, in SJ).  In typical fashion, it became a sushi and hockey gabfest, followed by baking later on the evening.  Nevertheless, we did complete our night with Chocolate Mint Whoopie Pies spiked with Mint Chocolate Baileys!

For the cookie-cakes, we used the Classic Chocolate Whoopie Pie recipe from the Whoopie Pies cookbook by Sarah Billingley and Amy Treadwell, with the slight modifications of using a full cup of unsweetened cocoa powder and adding an additional 1/4 – 1/3 cup of Mint Chocolate Baileys.

Mint Chocolate Baileys - the Baker's Aid

The girls had a lot of fun learning to use my cookie scoop.  Below, you can see the various attempts over the rounds:

The Full Scoop

The Half-Scoop


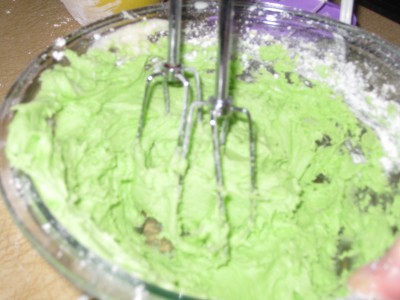
For the icing, we wanted a mint buttercream icing, because few things go better with chocolate than mint!  We modified the mint buttercream frosting recipe from the Whoopie Pies cook book by substituting the vanilla extract with 1 tablespoon of Mint Chocolate Baileys, and adding drops of psychedelic (my descriptor; not seen on the box) neon green food colouring while mixing until it turned an appropriate shade of green.

Bright green! (sorry for the blurry picture)

After the cakes cooled, we got to assemble them.  We did a ceremonial picture for the first:

Do you like how the colour of the knife matches the icing?

But in reality, we really made about double this much:

So...many...whoopie...pies...


An afternote:  I threw one into the freezer for about a week for a friend of mine.  Interestingly, although we had all commented that the whoopie pies could have used a little (lot) more Baileys flavour, as most of it got baked out, storing the whoopie pies for a few days brought the boozy flavour out.


Vanilla Blueberry Cream Whoopie Pies

written by Becky

In the world of food blogs there are many “clubs” out there to join. There are ones like the Martha Stewart Cupcakes Club that bakes a new recipe from the Cupcakes book monthly and everyone posts on it (the idea is to bake every recipe in the book), or there is The Daring Baker that sends out a recipe to all members and they all bake the same recipe and post their version on the same day, or others like this. I keep wanting to sign up for one of these but as a single girl in her 30’s, I don’t want to be forced to make an entire batch of cupcakes that I have no where to take and therefore the only person that will be consuming them is me! So instead I signed up for a much simpler one that was started by Rebecca at “I Wanna Be a Domestic Goddess”. The idea is to bake something with the seasonal ingredient that her and her friend decide on. Since I originally started following this blog because of the weekly Whoopie Pies that were being baked (which sadly no longer happens), I figured I would start with a Whoopie Pie recipe!

First of all, a note. I find it odd that July’s ingredient was blueberries. Blueberries in BC just barely become available in July so I was pretty much forced to wait until late in the month in order to bake with local berries. And oddly, next months ingredient is cherries – they will be done in the next week or two here I think! Oh well.  Anyways, I love fresh, BC blueberries. This is odd because as a child, I hated them! I think I found there was too much skin compared to fruit and I just didn’t like them at all. I obviously outgrew that though and grew to love them.

Butter & Brown Sugar

Although I love the other vanilla recipe I posted previously, this recipe is a new Whoopie Pie recipe. It is adapted from Whoopies! and I was trying to make it richer and more caramel’y. I used brown sugar instead of white sugar and added caramel flavour to it. Although the flavouring smelled amazing while baking, I don’t think it really impacted the flavour. They are still lovely little pies though! Airy and fluffy while still being sturdy and tasty (I really quite liked the texture of these and I can’t decide which recipe I actually like better now.) And the filling was so simple but it was delicious. It wasn’t overly sweet and yet it was packed full of flavour.

Brown Sugar Whoopie Pies (found here)

  • The delicious smelling batter

    1/2 cup butter, softened

  • 1 cup packed brown sugar
  • 1 tsp vanilla
  • 1/2 tsp caramel flavour (optional)
  • 1 egg
  • 2 1/3 cups all purpose flour
  • 1 1/4 tsp baking soda
  • pinch of salt
  • 1 cup buttermilk
  1. Preheat oven to 375°F and line 2 baking sheets with parchment paper.
  2. In the bowl of a stand mixer (or use a regular bowl and hand mixer), beat the butter for about 30 seconds. Add in the brown sugar and beat together until light and fluffy. Beat in the egg, vanilla and caramel flavour.
  3. In a separate bowl, whisk together the flour, baking soda and salt.
  4. Add the flour in 3 additions alternating with the buttermilk.
  5. Use a scoop, spoon or pipe the batter into mounds about 1-1.5 tablespoons each. (leave about 2 inches between each)
  6. Bake 8-10 minutes until the pies bounce back when touched (no indent should be left).
  7. Allow to cool on pan about 2 minutes before transferring to a rack to dry completely.

Just three ingredients in the filling!

Blueberry Cream Cheese Marshmallow Filling

  • 8oz cream cheese, room temp
  • 7.5 oz container of Marshmallow Fluff
  • 2 cups fresh, washed blueberries (preferably local!)
  1. Beat the cream cheese. Add in the fluff and beat until smooth.
  2. Stir in the blueberries gently.
Assemble Whoopie Pies: Pair similarly sized & shaped whoopie pies. Add a good sized scoop of the icing to one side of the pie and place to the top on! Don’t squish the berries! I have decided that the perfect ratio is two-to-one. So I use the same cookie scoop for doing the filling as I do for the cookies: 2 cookies, 1 scoop of icing. Perfection! Yum!

I had to cut them open to show the full blueberries inside!


Chocolate Chip Whoopies with Chocolate Marshmallow Mousse Filling

written by Becky

Chocolate Chip Whoopies With Chocolate Marshmallow Mousse

My best friend from high school and I share the same birthday! Although we aren’t nearly as close as we were in high school, it has always been sort of fun to share the day with her (and rub in that I am a few hours older!) This year, we both turned 30. While I made a fun cake for my birthday, I was unable to see her as she had planned some time away at her parents cabin up north to celebrate the big day. Since her husband wanted to surprise her with a special treat but didn’t think he would be able to hide a cake from her, he thought she would enjoy having some delicious Whoopie Pies instead! So the plan was made!

The Sloppy Chocolate Filling - pre-fixing it!

Although my friend, and I for that matter, is a big chocolate fan, I decided on chocolate chip Whoopie Pies because I wanted to put a tasty chocolate filling in the middle rather than make the straight chocolate Whoopie Pies. After making them, I dipped them in dark chocolate melting wafers and then into Skor bits. Mmm… it was tasty.

I want to comment on the filling here because it is AMAZING!! I started out following a recipe for homemade Chocolate Marshmallow Filling from the Whoopies! cookbook but strayed completely. First of all, it used raw egg whites. I think this can be ok but since I wasn’t in charge of storage etc, I didn’t want to take the chance. Secondly,

The finished Chocolate Marshmallow Mousse

when I got to the end of the recipe, the filling was sloppy – at which point I read the end of the recipe which said that it needs to be refrigerated 3-4 hours and it is suitable for spreading instead of piping. Well I like a nice thick filling and I needed it right then! I was supposed to deliver the Whoopie Pies the next day (and it was already later in the evening) so there was no time to wait. So I got creative. I included the recipe below but I just wanted to layout my thought pattern so if you get into trouble with filling, you have some ideas how to fix it!

  1. I heated the egg whites with the corn syrup to 150ÂşF to ensure that I killed all bacteria. (By the way, egg whites still beat very well – some say better – after heating).
  2. I added butter to thicken the filling without sweetening it (that would be the other option: more sugar).
  3. I melted chocolate chips with marshmallows to add to the filling to both thicken it and add more chocolate flavour.

Chocolate Chip Whoopie Pies (from Whoopie Pies)

  • 2 1/4 all purpose flour

    Making batter

  • 1 1/2 tsp baking powder
  • 1/2 tsp salt
  • 1/2 cup butter
  • 1/2 cup white sugar
  • 1/2 cup packed brown sugar
  • 2 eggs
  • 1/2 cup buttermilk
  • 2 Tb milk
  • 1 tsp baking soda
  • 1 tsp white vinegar
  • 1 tsp vanilla extract
  • 1+ cup of chocolate chips
  1. Preheat oven to 375°F. Line two baking sheets with parchment paper.
  2. Whisk together flour, baking powder & salt in a bowl
  3. In the bowl of a stand mixer, beat the butter for a minute or so and then add the sugars. Continue beating for another couple of minutes until light & creamy. Add the eggs one at a time.
  4. Add the buttermilk slowly with the mixer on low.
  5. In a small bowl or measuring cup, add the baking soda and then the vinegar to the milk.
  6. First mix in about half the flour mixture, then the milk mix, then finally the rest of the flour. Mix in the vanilla.
  7. With the beater on low or with your hand, stir in the chocolate chips.
  8.  Drop, or scoop (piping won’t work with those big chunks of chocolate in the batter) about 1-2 Tb of batter onto the baking sheets. Space them well as these cookies spread!
  9. Bake 8-10 min or until the cookies just start to brown. Allow them to cool a few minutes before transferring them to a drying rack.

Chocolate Marshmallow Mousse Filling (my own creation!)

  • 2 oz semisweet or unsweetened chocolate

    Cooking the egg whites to 150F to kill bacteria!

  • 2 egg whites
  • 1/3 cup corn syrup
  • 1 3/4 cup icing sugar
  • pinch of salt
  • 1 tsp vanilla
  • 3/4 cup butter, room temp and cut into tablespoon size pieces.
  • 1/2 cup chocolate chips
  • 1 cup mini marshmallows
  1. Melt the chocolate in the microwave at medium heat (don’t overdo it!) and set aside to cool.
  2. Before adding the chocolate the filling was a good sticky consistency!

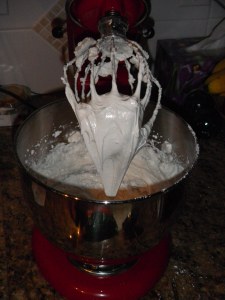
    Put the egg whites and corn syrup in the top of a double boiler and heat to 150°F while whisking continually.

  3. Transfer to the bowl of a stand mixer (or just a regular bowl if you are using a hand mixer). Beat egg whites for about 7-8 minutes with the whisk attachment until the outside of the bowl is no longer hot (the beaten egg whites should be at room temp). Note this is just like making Swiss Meringue Buttercream!
  4. Mix in the melted chocolate. This is when the filling will lose the beautiful puffy peaks you just created! Add vanilla.
  5. Melt the chocolate chips with the marshmallows in the microwave while you wait.
  6. Slowly beat in the icing sugar and salt.
  7. Add butter 1 tablespoon at a time while the mixer is running. Beat well between each addition.
  8. Beat in the chocolate chips & marshmallow mix.
  9. This stuff tastes delicious so eat some!
Fill the the Whoopie Pies with the filling. Squish together. Dip in melted chocolate and then dip into Skor bits! Yum!!