Tag Archives: Recipes

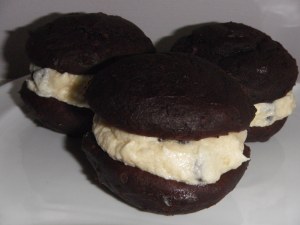
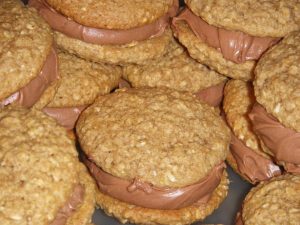
Oatmeal Nutella-cream cheese filled Whoopie Pies

Oatmeal Nutella Whoopie PiesSometimes the recipes for my whoopie pies are inspired by a particular craving, sometimes by a particular seasonal treat, sometimes a suggestion by a friend, and sometimes they are just based on the ingredients I have on hand.

I knew I wanted to make a Nutella-cream cheese filling (and I had both Nutella and cream cheese) but I hadn’t totally decided on what kind of whoopie to stuff it in – vanilla, chocolate, chocolate chunk, something boozy… Well, I went shopping and meant to pick up either milk or buttermilk (I normally just have almond milk at home) but I completely forgot. I got home and realized that the only Whoopie Pies I could make without milk or buttermilk were the oatmeal ones. Besides the necessity to make these based on what I had on hand, I also wanted to try this recipe out since it was one of the few recipes in Whoopie Pies that I hadn’t yet tried!

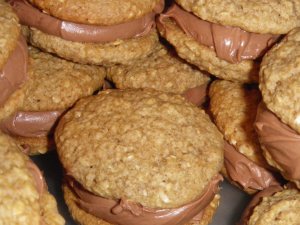
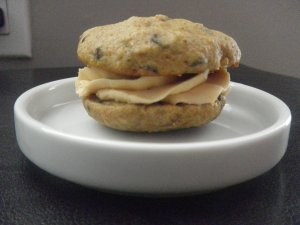
I actually really liked the texture contrast between the chewier oat-y Whoopie Pies and the smooth Nutella filling. Also, in case you are wondering, the Whoopie Pies are still soft (no crispy cookies here!) and “whoopie-pie-like”! And the filling is not at all lacking in Nutella taste! Yum!Oct 2012 043
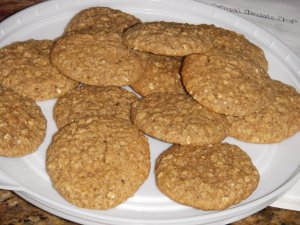
Oatmeal Whoopie Pies – from Whoopie Pies (makes about 18 filled Whoopie pies)

  • 1/4 cup butter, at room temp
  • 1/2 cup brown sugar
  • 1/4 cup white sugar
  • 2 eggs
  • 1 tsp vanilla
  • 1 1/2 cup rolled oats
  • 3/4 cup flour
  • 1/2 tsp baking soda
  • 1/2 tsp cinnamon
  • 1 tsp salt
  1. Preheat oven to 350°F and line two baking sheets with parchment paper.
  2. In the bowl of a stand mixer (or in a regular bowl and use your hand mixer), cream together butter and sugars until fluffy and pale, about 3 minutes. Beat in the eggs one at a time and add the vanilla.
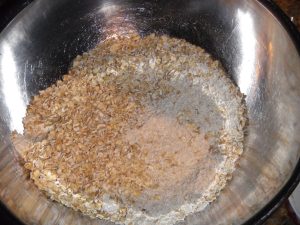
  3. In a food processor, blender, or Magic Bullet (my preference!),Oct 2012 040 process 3/4 cup of oatmeal until it resembles whole grain flour (as can be seen in the picture on the right – in contrast to the unprocessed oats on the left). Transfer to a bowl and add the flour, baking soda, cinnamon, salt and remaining oats. Stir together.
  4. Add the dry ingredients to the wet and beat on low until combined.
  5. Spoon or scoop 1 to 1.5 Tb of batter onto the baking sheets about 2 inches apart. Bake for about 11 minutes or until the cookies are set and edges just start to brown.
  6. Let cool 3-4 minutes on the on the pan before transferring to a cooling rack.

Nutella Cream Cheese Filling

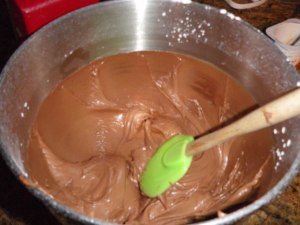
  • 1 cup NutellaCreamy Nutella Cream Cheese Filling
  • 4 oz (1/2 a pkg) cream cheese
  • 2 to 2 1/2 icing sugar
  1. Beat together Nutella and cream cheese.
  2. Add icing sugar 1/2 cup at a time until a medium consistency is reached. If you add to much and it becomes stiff, add milk 1 tsp at a time until it is soft and smooth!
Assemble by filling two equally sized & shaped Whoopie Pies with 1 to 1.5 Tb filling (generally use as much filling as you used for the batter of each side of the Whoopie). Squish together and enjoy!

Oct 2012 044


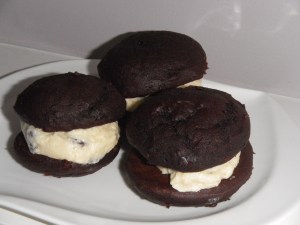
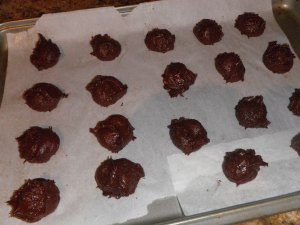
Chocolate Chip Cookie Dough Filling Chocolate Whoopie Pies

I admit it: part of the reason that I love to bake is that I really love picking away at the dough/batter while I am preparing whatever it is I am baking (I really don’t get those people that NEVER eat the dough). So after seeing people use cookie dough (with no egg and thinned with milk to create the right consistency) to frost cupcakes and cakes, I figured it had to be used to make a filling for Whoopie pies! So that is what I did!

These went over VERY well at the baby shower that I took them to. My friend’s twin nieces seriously went nuts over them and were conspiring as to how to take more without looking too obvious! It was quite hilarious to see them whispering!

I was actually a tiny bit disappointed: although the Whoopie Pies were delicious, once the filling was sandwiched in the middle, the cookie dough ‘flavour’ was lost. The filling was tasty on its own and definitely tasted like cookie dough but in the Whoopie Pie I just couldn’t tell what it was anymore, which made me wonder “what is it that makes cookie dough so tasty???”

By the way, if you want smooth topped Whoopie Pies rather than these ones, which formed cracks over the top but still tasted great, try this recipe (you can replace the Kahlua with ANY liquid – or just more milk). I was out of milk but had buttermilk so I used the below recipe instead! They still tasted great but they weren’t as pretty. (I think if you add 1 or 2Tb more buttermilk, this recipe would produce smooth tops as well!)

Chocolate Whoopie Pies (makes 22 smaller Whoopie Pies)

(adapted from Cookies by Martha Stewart)

  • 1 3/4 cup flour
  • 3/4 cup cocoa
  • 1/2 Tb baking soda
  • 1/2 tsp baking powder
  • 1/2 tsp salt
  • 1 tsp espresso powder
  • 1/2 cup butter, room temp
  • 1/2 cup brown sugar
  • 1/2 cup white sugar
  • 1 egg
  • 1 cup buttermilk
  • 1 tsp vanilla
  1. Preheat oven to 400°F and line two baking sheets with parchment paper.
  2. In the bowl of a stand mixer, cream together butter and two sugars. Beat until light and fluffy (3-4 minutes).
  3. Add the egg and vanilla and beat well.
  4. In a separate bowl, whisk together flour, cocoa, baking soda, baking powder, salt and espresso powder.
  5. Alternatively add the dry ingredients and the buttermilk and beat to combine.
  6. Scoop or spoon about 1 Tablespoon onto the prepared baking sheets.
  7. Bake until set (they will bounce back when lightly pressed) – about 8-10 minutes. Cool 2-3 minutes before transferring to a cooling rack to cool completely.

Chocolate Chip Cookie Dough Filling

  • 1/2 cup butter, room temp
  • 1/2 cup sugar
  • 1/2 cup brown sugar
  • 1/4 tsp salt
  • 1/4 tsp vanilla
  • 1 cup flour
  • 2-3 TB milk (or as much as required to create an ‘icing’ like consistency)
  • 1 cup chocolate chips
  1. Beat together butter and two sugars until light and fluffy. Add salt, vanilla and flour.
  2. Add enough milk to create a filling that is fluffy and smooth and light. Stir in chocolate chips.
Assemble by filling two equally sized & shaped Whoopie Pies with 1-1.5Tb filling (generally use as much filling as you used for the batter of each side of the Whoopie plus a little). Press together and refrigerate until about an hour before serving (they can be eater straight from the fridge as well!).

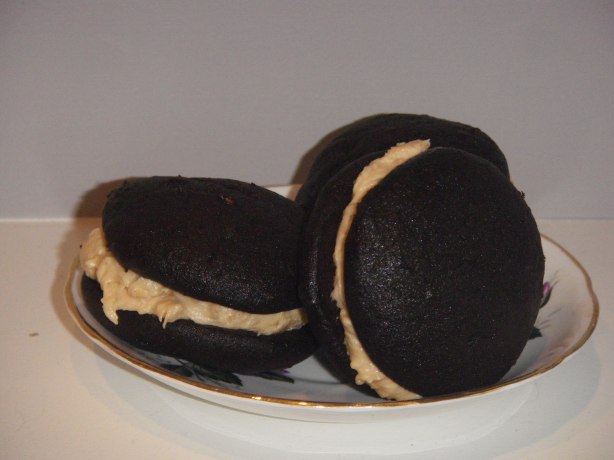
Inside-Out Peanut Butter Cup Whoopie Pies

I learned something new recently. There are people in the world that really don’t like chocolate and peanut butter together. I can understand that some people don’t like peanut butter and maybe some don’t like chocolate, but for those people that like both and don’t like them together… I am completely stumped! It just makes no sense to me! The good news is, those of us that LOVE the combination far overpower those that hate the flavours together! So I will continue to use the two flavours frequently in baking!

These Whoopie Pies were made for no real reason besides to use up some filling that I had made to fill a wedding cake. Without knowing exactly how much filling I needed for the cake, I totally overdid it and doubled the recipe and had WAAAY too much filling. It was kind of good though because these Whoopie Pies were a HUGE hit and it was mostly because of the filling (although the ‘vessels’ to carry the filling were also amazing!).

Just to warn you, the filling was a bit of a pain to make (I was sort of glad I didn’t have to make it twice to enjoy it twice!). Ok, it is a total pain to make. Especially if you accidentally hit the candy thermometer, sending it flying across the room, splattering sugar syrup that is thick and sticky and 240°F on your arm. Painful. It blistered in fact – almost immediately. It was only 1 bigger (maybe 1/3 the size of a dime) and two tiny spots but it HURT! So yes, the filling can be a pain to make. It also requires 4 bowls/pots. This is also a pain. BUT it is delicious. Truly it is! Once in awhile it is worth it to make something this good!

These Whoopie Pies were great. I used a different Whoopie Pie recipe than I did for the Peanut Butter and Honey Whoopie Pies and these ones are far superior! They are fluffy and soft and flavourful!

I love the chocolate outside with the peanut butter filling (or the vegan version) so figured it was time to reverse the combination! They are like a peanut butter cup inside out: chocolate on the inside, peanut butter on the outside. Delicious!

Peanut Butter Whoopie Pies (from Whoopies!)

makes about 17 filled

  • 1/4 cup butter, softened
  • 1 cup packed brown sugar
  • 5 Tb peanut butter
  • 1 tsp vanilla
  • 1 egg
  • 2 1/3 cup all-purpose flour
  • 1 tsp baking soda
  • 1/4 tsp salt
  • 1 cup buttermilk
  1. Preheat oven to 375°F and line a couple baking sheets with parchment.
  2. Beat together butter, sugar and peanut butter until light and fluffy (a few minutes). Beat in egg and vanilla.
  3. In a separate bowl, whisk together the flour, baking soda and salt.
  4. Alternate between adding the dry or buttermilk to the butter mix, adding the dry ingredients in 3 additions and the buttermilk in two.
  5. Scoop/spoon 1.4 Tb batter onto the baking sheets leaving space between them for spreading.
  6. Bake 10-12 minutes or until the whoopies spring back when lightly pressed (they shouldn’t still have a finger mark!)
  7. Allow to cool on the baking sheet 2-3 minutes and then transfer to cooling racks.

Chocolate Mousse Filling

This recipe comes from here and is delicious but I warn you that it does require some work!

  • 12 oz. dark (bittersweet or semisweet) chocolate, chopped
  • 6 Tablespoons unsalted butter
  • 1/2 cup sugar
  • 3 Tablespoons water
  • 5 large egg whites
  • 1 1/2 cups chilled whipping cream
  • 1/4 cup powdered sugar
  1. Melt chocolate and butter in a large bowl in the microwave on medium heat until smooth. Set aside to cool.
  2. In a small saucepan, add sugar and water and heat on low until sugar dissolves. Increase heat to medium and boil syrup without stirring until 240°F (use a candy thermometer).
  3. With an mixer, beat egg whites until soft peaks are formed. Very slowly add the hot syrup to the egg whites with the beater still on. Beat until medium stiff peaks form (~3min).
  4. Fold 1/3 egg white mixture into the chocolate mixture to lighten. Fold in another 1/3, and then finally the remaining egg whites.
  5. In yet another bowl (I warned you that this is annoying to make). beat together the whipping cream and the powdered sugar until stiff peaks form. Fold into the chocolate mixture.
  6. Cover and refrigerate about 4 hours.
Assemble by filling two equally sized & shaped Whoopie Pies with 1.5-2Tb filling (generally I use as much or a little more filling as used for the batter of each side of the Whoopie). Press together and refrigerate. Eat from the fridge as the filling gets soft.


Vegan Chocolate Whoopie Pies with Peanut Butter & Toasted Coconut Filling

Finally, back to posting! Sorry for the lack of posts… it seems that I have been making everything except Whoopie Pies lately. I made some recently that had great whoopies, but the filling was super messy. I couldn’t possibly post that! I need to remake those as the taste was great and I love the flavours (Lemon coconut! Yum!)

Anyways, enough daydreaming about those ones and onto the treats I made for this post – which had my absolute favourite flavour combination – Peanut Butter & Chocolate! And a little toasted coconut in there for some extra yum! Apparently I am obsessed with coconut lately. I want it in everything. Especially with chocolate.

So why vegan? Well although I have a lot of friends that are either vegetarian or eat limited meat (like me, many don’t eat red meat or pork), I only have one friend that is vegan. Sure, sometimes she will eat very limited dairy if she doesn’t have much of a choice, but generally she is very conscientious and stays away from any animal product. Well I have been promising her vegan Whoopie Pies for about a year now… and now she is going on a traveling adventure for almost a year and I felt I definitely owed it to her before she left to finally make some! I will have to come up with a great recipe to welcome her home next year too 🙂

I was actually super surprised how well these came out. They puffed up nice and were a good consistency and tasted like any other delicious Whoopie Pie. I don’t like the taste of ‘vegan butter’ so I went with coconut oil instead for the Whoopies and used Tofutti (vegan cream cheese) in the filling with peanut butter to “mask” the tofu flavour if I didn’t like it! I am not sure if it was necessary though as I didn’t taste any of the “weird tofu” flavour that I was afraid would mess up a good dessert!

For those looking to bake vegan or dairy-free, this recipe uses a buttermilk substitute: in the same way that you can add vinegar to regular milk to get a dairy buttermilk substitute, you can do this with rice milk, almond milk and soy milk. It works exactly the same – add one tablespoon to one cup and let it sit for about 10 minutes to “sour” it. Also, another great substitution to know is using ground flax seed with water to make up an egg – 1 Tb of ground flax + 3 Tb of water.

Whether you are vegan or just making some of these for a friend that is, I am sure everyone will love them and not even know that they are for any special diet! You really can’t tell any difference!

Vegan Chocolate Whoopie Pies (makes about 15 medium sized pies)

  • 1 cup rice or almond or soy milk
  • 1 Tb white vinegar
  • 1 Tb flax seed mixed with 3 Tb warm water
  • 1 1/3 cups all-purpose flour
  • 2/3 cups cocoa powder
  • 1 tsp baking soda
  • 1/2 tsp baking powder
  • 1/4 tsp salt
  • 1/3 cup coconut oil
  • 1 cup packed brown sugar
  • 1 tsp vanilla extract
  1. Preheat oven to 375°F and line two baking sheets with parchment paper.
  2. Measure the milk in a liquid measuring cup and add the vinegar to it. Allow to sit about while you do everything else – it may start to look kind of chunky or curdled but that is good!
  3. In a medium bowl whisk together the flour, cocoa powder, baking soda, baking powder and salt.

    Coconut oil + sugar + “flax-egg”

  4. In the bowl of a mixer, mix the coconut oil and brown sugar until well mixed. It will not become fluffy like butter and sugar (or at least mine didn’t) so add the flax seed+ water and continue mixing. Add the vanilla and beat about 2 minutes.
  5. Add the flour mixture alternatively with the non-dairy milk mix (start and end with the flour).
  6. Spoon or scoop 1.5 Tb of mixture onto prepared baking sheets at least 2 inches apart. Bake for 10-12 minutes or until the tops will bounce back when touched (i.e. a finger ‘indent’ shouldn’t remain!)
  7. Allow cakes to cool a few minutes on the baking sheet before removing to a cooling rack.

    Ready to bake

Vegan Peanut Butter & Toasted Coconut Filling

  • 1/2 pkg of Tofutti (total package is 8oz)
  • 1/2 cup peanut butter
  • 1 tsp vanilla
  • 2 1/2 cups icing sugar
  • 1/2 cup toasted coconut (it burns quick in the oven so be careful!)
  1. Beat the Tofutti with the peanut butter until very smooth. Add the vanilla and then the icing sugar 1/2 cup at a time. 
  2. Stir in the toasted coconut
Assemble by filling two equally sized & shaped Whoopie Pies with 1.5-2Tb filling (generally use as much filling as you used for the batter of each side of the Whoopie plus a little). Press together and refrigerate until about an hour before serving.

Mmm…

Vegan Chocolate Whoopie Pies with Peanut Butter & Toasted Coconut Filling


The Search for Courteney (aka Mint Chocolate Baileys Chocolate Mint Whoopie Pies)

Written by Courteney


While I am fully aware that putting my name in the title of a blog post is (a) incredibly conceited, and (b) completely irrelevant to the topic of this post, I felt that the occasion of my months-long absence from this blog required some sort of acknowledgment.  That, and maybe Becky will stop bugging me to churn out this post I’ve been holding on to. (Just kidding!)

A few months ago, a two friends and I decided to celebrate the end of the school year by having a girls’ Hockey and Baking night.  The original plan was to bake whoopie pies while watching the hockey game (it was the San Jose Sharks vs. the Vancouver Canucks, in SJ).  In typical fashion, it became a sushi and hockey gabfest, followed by baking later on the evening.  Nevertheless, we did complete our night with Chocolate Mint Whoopie Pies spiked with Mint Chocolate Baileys!

For the cookie-cakes, we used the Classic Chocolate Whoopie Pie recipe from the Whoopie Pies cookbook by Sarah Billingley and Amy Treadwell, with the slight modifications of using a full cup of unsweetened cocoa powder and adding an additional 1/4 – 1/3 cup of Mint Chocolate Baileys.

Mint Chocolate Baileys - the Baker's Aid

The girls had a lot of fun learning to use my cookie scoop.  Below, you can see the various attempts over the rounds:

The Full Scoop

The Half-Scoop


For the icing, we wanted a mint buttercream icing, because few things go better with chocolate than mint!  We modified the mint buttercream frosting recipe from the Whoopie Pies cook book by substituting the vanilla extract with 1 tablespoon of Mint Chocolate Baileys, and adding drops of psychedelic (my descriptor; not seen on the box) neon green food colouring while mixing until it turned an appropriate shade of green.

Bright green! (sorry for the blurry picture)

After the cakes cooled, we got to assemble them.  We did a ceremonial picture for the first:

Do you like how the colour of the knife matches the icing?

But in reality, we really made about double this much:

So...many...whoopie...pies...


An afternote:  I threw one into the freezer for about a week for a friend of mine.  Interestingly, although we had all commented that the whoopie pies could have used a little (lot) more Baileys flavour, as most of it got baked out, storing the whoopie pies for a few days brought the boozy flavour out.


Vanilla Blueberry Cream Whoopie Pies

written by Becky

In the world of food blogs there are many “clubs” out there to join. There are ones like the Martha Stewart Cupcakes Club that bakes a new recipe from the Cupcakes book monthly and everyone posts on it (the idea is to bake every recipe in the book), or there is The Daring Baker that sends out a recipe to all members and they all bake the same recipe and post their version on the same day, or others like this. I keep wanting to sign up for one of these but as a single girl in her 30’s, I don’t want to be forced to make an entire batch of cupcakes that I have no where to take and therefore the only person that will be consuming them is me! So instead I signed up for a much simpler one that was started by Rebecca at “I Wanna Be a Domestic Goddess”. The idea is to bake something with the seasonal ingredient that her and her friend decide on. Since I originally started following this blog because of the weekly Whoopie Pies that were being baked (which sadly no longer happens), I figured I would start with a Whoopie Pie recipe!

First of all, a note. I find it odd that July’s ingredient was blueberries. Blueberries in BC just barely become available in July so I was pretty much forced to wait until late in the month in order to bake with local berries. And oddly, next months ingredient is cherries – they will be done in the next week or two here I think! Oh well.  Anyways, I love fresh, BC blueberries. This is odd because as a child, I hated them! I think I found there was too much skin compared to fruit and I just didn’t like them at all. I obviously outgrew that though and grew to love them.

Butter & Brown Sugar

Although I love the other vanilla recipe I posted previously, this recipe is a new Whoopie Pie recipe. It is adapted from Whoopies! and I was trying to make it richer and more caramel’y. I used brown sugar instead of white sugar and added caramel flavour to it. Although the flavouring smelled amazing while baking, I don’t think it really impacted the flavour. They are still lovely little pies though! Airy and fluffy while still being sturdy and tasty (I really quite liked the texture of these and I can’t decide which recipe I actually like better now.) And the filling was so simple but it was delicious. It wasn’t overly sweet and yet it was packed full of flavour.

Brown Sugar Whoopie Pies (found here)

  • The delicious smelling batter

    1/2 cup butter, softened

  • 1 cup packed brown sugar
  • 1 tsp vanilla
  • 1/2 tsp caramel flavour (optional)
  • 1 egg
  • 2 1/3 cups all purpose flour
  • 1 1/4 tsp baking soda
  • pinch of salt
  • 1 cup buttermilk
  1. Preheat oven to 375°F and line 2 baking sheets with parchment paper.
  2. In the bowl of a stand mixer (or use a regular bowl and hand mixer), beat the butter for about 30 seconds. Add in the brown sugar and beat together until light and fluffy. Beat in the egg, vanilla and caramel flavour.
  3. In a separate bowl, whisk together the flour, baking soda and salt.
  4. Add the flour in 3 additions alternating with the buttermilk.
  5. Use a scoop, spoon or pipe the batter into mounds about 1-1.5 tablespoons each. (leave about 2 inches between each)
  6. Bake 8-10 minutes until the pies bounce back when touched (no indent should be left).
  7. Allow to cool on pan about 2 minutes before transferring to a rack to dry completely.

Just three ingredients in the filling!

Blueberry Cream Cheese Marshmallow Filling

  • 8oz cream cheese, room temp
  • 7.5 oz container of Marshmallow Fluff
  • 2 cups fresh, washed blueberries (preferably local!)
  1. Beat the cream cheese. Add in the fluff and beat until smooth.
  2. Stir in the blueberries gently.
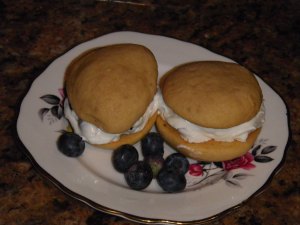
Assemble Whoopie Pies: Pair similarly sized & shaped whoopie pies. Add a good sized scoop of the icing to one side of the pie and place to the top on! Don’t squish the berries! I have decided that the perfect ratio is two-to-one. So I use the same cookie scoop for doing the filling as I do for the cookies: 2 cookies, 1 scoop of icing. Perfection! Yum!

I had to cut them open to show the full blueberries inside!


Chocolate Chip Whoopies with Chocolate Marshmallow Mousse Filling

written by Becky

Chocolate Chip Whoopies With Chocolate Marshmallow Mousse

My best friend from high school and I share the same birthday! Although we aren’t nearly as close as we were in high school, it has always been sort of fun to share the day with her (and rub in that I am a few hours older!) This year, we both turned 30. While I made a fun cake for my birthday, I was unable to see her as she had planned some time away at her parents cabin up north to celebrate the big day. Since her husband wanted to surprise her with a special treat but didn’t think he would be able to hide a cake from her, he thought she would enjoy having some delicious Whoopie Pies instead! So the plan was made!

The Sloppy Chocolate Filling - pre-fixing it!

Although my friend, and I for that matter, is a big chocolate fan, I decided on chocolate chip Whoopie Pies because I wanted to put a tasty chocolate filling in the middle rather than make the straight chocolate Whoopie Pies. After making them, I dipped them in dark chocolate melting wafers and then into Skor bits. Mmm… it was tasty.

I want to comment on the filling here because it is AMAZING!! I started out following a recipe for homemade Chocolate Marshmallow Filling from the Whoopies! cookbook but strayed completely. First of all, it used raw egg whites. I think this can be ok but since I wasn’t in charge of storage etc, I didn’t want to take the chance. Secondly,

The finished Chocolate Marshmallow Mousse

when I got to the end of the recipe, the filling was sloppy – at which point I read the end of the recipe which said that it needs to be refrigerated 3-4 hours and it is suitable for spreading instead of piping. Well I like a nice thick filling and I needed it right then! I was supposed to deliver the Whoopie Pies the next day (and it was already later in the evening) so there was no time to wait. So I got creative. I included the recipe below but I just wanted to layout my thought pattern so if you get into trouble with filling, you have some ideas how to fix it!

  1. I heated the egg whites with the corn syrup to 150ºF to ensure that I killed all bacteria. (By the way, egg whites still beat very well – some say better – after heating).
  2. I added butter to thicken the filling without sweetening it (that would be the other option: more sugar).
  3. I melted chocolate chips with marshmallows to add to the filling to both thicken it and add more chocolate flavour.

Chocolate Chip Whoopie Pies (from Whoopie Pies)

  • 2 1/4 all purpose flour

    Making batter

  • 1 1/2 tsp baking powder
  • 1/2 tsp salt
  • 1/2 cup butter
  • 1/2 cup white sugar
  • 1/2 cup packed brown sugar
  • 2 eggs
  • 1/2 cup buttermilk
  • 2 Tb milk
  • 1 tsp baking soda
  • 1 tsp white vinegar
  • 1 tsp vanilla extract
  • 1+ cup of chocolate chips
  1. Preheat oven to 375°F. Line two baking sheets with parchment paper.
  2. Whisk together flour, baking powder & salt in a bowl
  3. In the bowl of a stand mixer, beat the butter for a minute or so and then add the sugars. Continue beating for another couple of minutes until light & creamy. Add the eggs one at a time.
  4. Add the buttermilk slowly with the mixer on low.
  5. In a small bowl or measuring cup, add the baking soda and then the vinegar to the milk.
  6. First mix in about half the flour mixture, then the milk mix, then finally the rest of the flour. Mix in the vanilla.
  7. With the beater on low or with your hand, stir in the chocolate chips.
  8.  Drop, or scoop (piping won’t work with those big chunks of chocolate in the batter) about 1-2 Tb of batter onto the baking sheets. Space them well as these cookies spread!
  9. Bake 8-10 min or until the cookies just start to brown. Allow them to cool a few minutes before transferring them to a drying rack.

Chocolate Marshmallow Mousse Filling (my own creation!)

  • 2 oz semisweet or unsweetened chocolate

    Cooking the egg whites to 150F to kill bacteria!

  • 2 egg whites
  • 1/3 cup corn syrup
  • 1 3/4 cup icing sugar
  • pinch of salt
  • 1 tsp vanilla
  • 3/4 cup butter, room temp and cut into tablespoon size pieces.
  • 1/2 cup chocolate chips
  • 1 cup mini marshmallows
  1. Melt the chocolate in the microwave at medium heat (don’t overdo it!) and set aside to cool.
  2. Before adding the chocolate the filling was a good sticky consistency!

    Put the egg whites and corn syrup in the top of a double boiler and heat to 150°F while whisking continually.

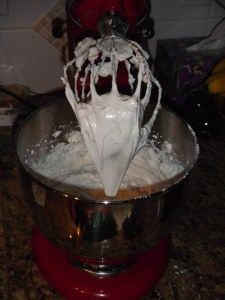
  3. Transfer to the bowl of a stand mixer (or just a regular bowl if you are using a hand mixer). Beat egg whites for about 7-8 minutes with the whisk attachment until the outside of the bowl is no longer hot (the beaten egg whites should be at room temp). Note this is just like making Swiss Meringue Buttercream!
  4. Mix in the melted chocolate. This is when the filling will lose the beautiful puffy peaks you just created! Add vanilla.
  5. Melt the chocolate chips with the marshmallows in the microwave while you wait.
  6. Slowly beat in the icing sugar and salt.
  7. Add butter 1 tablespoon at a time while the mixer is running. Beat well between each addition.
  8. Beat in the chocolate chips & marshmallow mix.
  9. This stuff tastes delicious so eat some!
Fill the the Whoopie Pies with the filling. Squish together. Dip in melted chocolate and then dip into Skor bits! Yum!!


Double Vanilla Whoopie Pies with Chai Spice Filling

written by Becky

Double Vanilla Whoopie Pies with Chai Spice Filling

Paired off! Note the "Grande" sized Whoopie Pie... it was featured in the "How to eat a Whoopie Pie" post!

I doubt anyone has really noticed that there is no recipe for the Whoopies that star as our header on this blog. Or that the Whoopie Pies devoured in our “How to eat a Whoopie Pie” post are not discussed anywhere. Well here it is! And it is a good one! Just writing the title of this post makes me want to drool (well almost). I made these Whoopie Pies a couple months back but I had made a couple batches of Whoopies that week and thought I would save this post for a week when we didn’t have a recipe to post. And since the post on Chocolate Mint Whoopie Pies that Courteney promised has yet to arrive, I figure it is time to post about these delightful Whoopies!

These were made to please some of my fabulous friends from the gym. Now some people figure that gym-friends (as I like to call them) may not like to eat since they are so “health-conscience” and fit but that isn’t true at all! Realistically, we LOVE food! And that is why we love the gym: it allows us to love food! (Although there are also some of us that really love working out for lots of reasons on top of the calorie burn!) Anyways, it was a good thing that I set aside a half dozen of these to take to my taste testers at work as otherwise there would be none left! I won’t mention any names but one of my favourite foodie-gym-friend’s kindly requested to take a couple extra home insisting they were for her “son”… I now know it was a ploy to have extra for herself!

Double Vanilla Whoopie Pies

(makes 16 or so)
adapted from Vanilla Whoopie Pies in Whoopie Pies by Sarah Billingley and Amy Treadwell

Adding the extract.

  • 2 1/4 all purpose flour
  • 1 1/2 tsp baking powder
  • 1/2 tsp salt
  • 1/2 cup butter
  • 1/2 cup white sugar
  • 1/2 cup packed brown sugar
  • 2 eggs
  • 1/2 cup buttermilk
  • 2 Tb milk
  • 1 tsp baking soda
  • 1 tsp white vinegar
  • 1 tsp vanilla extract
  • 1 vanilla bean – scraped to remove the vanilla (see a video here) (not totally necessary but it is what makes it “double” vanilla and it is SO incredible!)

    Before baking!

  1.  Preheat oven to 375°F. Line two baking sheets with parchment paper.
  2. Whisk together flour, baking powder & salt in a bowl
  3. In the bowl of a stand mixer, beat the butter for a minute or so and then add the sugars. Continue beating for another couple of minutes until light & creamy. Add the eggs one at a time.
  4. Add the buttermilk slowly with the mixer on low.
  5. In a small bowl or measuring cup, add the baking soda and then the vinegar to the milk.
  6. First mix in about half the flour mixture, then the milk mix, then finally the rest of the flour. Mix in the vanilla and the vanilla bean “scrapings” (I wonder what that inside part is actually called?)
  7.  Drop, scoop or pipe about 1-2 Tb of batter onto the baking sheets. Space them well as these cookies spread!
  8. Bake 8-10 min or until the cookies just start to brown. Allow them to cool a few minutes before transferring them to a drying rack.

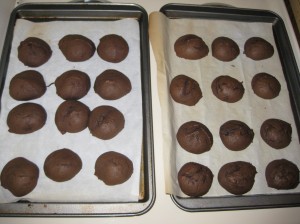
Baked Whoopies! They look so lovely and poofy!

This is the part called "finding your partner" - the outsides of the Whoopie Pies should be about the same size.

Chai Spice Filling

I feel like I should add a comment here about how reliable the filling recipe is: I made these two months ago, I don’t remember exactly what I did for the amount of spices. Sorry! This is a guess… I should have made notes!

  • 1/2 cup butter (room temp)

    More Cinnamon Please! I love cinnamon so I added more here!

  • 4 cups icing sugar
  • 1/4 cup boiling water
  • 1 chai tea bag
  • 3/4 tsp cardamom
  • 3/4 tsp ginger
  • 1 1/2 tsp cinnamon
  • 1/4 tsp ground cloves
  • 1/4 tsp nutmeg
  • 1/4 tsp allspice
  • 1 tsp vanilla
  1. Place tea bag into small container with the 1/4 cup water. Allow to steep for as long as you can wait… and allow the water to cool.
  2. Whisk together the spices with 1 cup of icing sugar.
  3. Beat the butter then add the  1 cup of icing sugar. Add the water steeped with tea and the vanilla.
  4. Add the rest of the icing sugar (and more if needed to reach “piping” consistency). Spread between two cookies and enjoy! Mmm…
Adjust the amount of spice to what you like! If you don’t like it as spicy, reduce amounts! If you like one spice better, increase it! I plan on trying to make this filling with the concentrated Chai tea mix but I haven’t tried it yet.

Mountain o' Tasty Whoopie Pies! Double Vanilla with Chai Filling


Almond Whoopie Pies – Two ways!

written by Becky

Almond Whoopie Pies with Lemon Cream Cheese Filling AND/OR
Zucchini-Almond Whoopie Pies with Almond Cream Cheese Filling

This was the first batch of by request “how would you make your perfect Whoopie Pie”. After posting the “What’s Your Flavour?” post, I had a few requests for the perfect flavour for that person! Since my friend Nicole was the first to

These two sure came in handy! I bought them at Costco awhile back but they haven't been used in the same recipe yet!

submit her request, by text, she is the first to get her “perfect Whoopie” (or hopefully perfect! She hasn’t yet tried them – hopefully she will comment tomorrow!) Nicole’s request was an Almond Whoopie Pie with Lemon Cream Cheese Filling.

So you may be wondering why the “two-ways” if Nicole only made one request. Well the second half of the batch were created after talking to a friend who claimed she had never had a Whoopie Pie. During this same conversation, we discussed an amazing Almond-Zucchini Bundt Cake she had made once. This cake sounds like it could almost be healthy but with a LOT of sugar, butter and sour cream, it is obvious the zucchini is simply for moisture and not for any vegetable servings! So I figured, since Nicole didn’t need an entire batch of Whoopie Pies just for her, I would alter half of the batter and make Almond-Zucchini Whoopie Pies with Almond Cream Cheese Filling to share with my friend. After scooping enough regular Almond Whoopie Pies, I then stirred in some zucchini to the second half. Of course, I forgot that this would add a lot of moisture so after baking half, I had to add more flour to the mix to get the same lovely whoopie pie mounds that I was hoping for. I then paired a flat and a fat Whoopie pie together for each cookie!

Here is how it was done:

Almond Whoopie Pies with Lemon Cream Cheese Icing

Adapted quite a bit from the Vanilla Whoopie Pie found in the book Whoopie Pies by Sarah Billingsley & Amy Treadwell

  • 1 3/4 cup all-purpose flour

    Scooping the Whoopies!

  • 1/2 cup ground toasted almonds (toast slivered ones and then grind in food processor)
  • 1/2 tsp salt
  • 6 Tb butter, room temp
  • 2 Tb shortening (could use all butter)
  • 3/4 c packed brown sugar
  • 1/4 c white sugar
  • 2 eggs
  • 1/2 cup buttermilk
  • 2 Tb almond milk (regular is fine, I just happened to have almond milk)
  • 1 tsp baking soda
  • 1 tsp  white vinegar
  • 1 tsp vanilla extract
  • 1 tsp almond extract
  • sliced almonds
  1. Preheat oven to 375 and line baking sheets with parchment paper.
  2. Whisk together flour, ground almonds & salt in a bowl.
  3. In a stand mixer (or with a hand mixer), beat together butter and shortening and then beat in the two sugars until light and creamy, a few minutes. Add the eggs, one at a time, and then the buttermilk and beat until well combined.
  4. In a measuring cup or small bowl, mix milk, baking soda and vinegar.
  5. Add half of the dry mix to the mixer while beating, then the milk and finally the rest of the dry mix.
  6. Add the extracts and beat until just combined.
  7. Using a spoon, cookie scoop or piping bag, scoop/pipe cookies onto the prepared cookie sheet.

    Look how much those little guys spread! The left is before baking, the right, after.

    Put several sliced almonds to the tops of half of the Whoopie Pies.
    As a sidenote: these whoopies spread quite a bit so don’t make them too huge!

  8. Bake 8-10 minutes until just barely browned.
  9. Remove from oven, allow to cool a few minutes on the cookie sheet and then transfer to a rack to cool completely.

Lemon Cream Cheese Filling

  • 1 pkg cream cheese, room temp
  • 1/2 cup butter, room temp
  • lemon zest from one lemon
  • 3/4 tsp lemon extract
  • 2-3 cups icing sugar
 Beat together cream cheese and butter. Add lemon zest and extract. Beat in icing sugar 1/2 cup at a time.

Almond Whoopie Pie with Lemon Cream Cheese Filling

Zucchini Almond Whoopie Pies & Almond Cream Cheese Filling

Follow above recipe but add the following:

Grated Zucchini!

  • 1 zucchini, grated and squeezed between paper towel to remove as much liquid as possible
  • 3/4 cup all purpose flour

Add the flour with the rest of the flour. (This amount is approximate since I didn’t add this flour at first and I only added zucchini to half of the batch I made.)

Mixing in the Zucchini!


Stir in the zucchini at the end.

Almond Cream Cheese Filling

Make as the lemon filling but do not add the zest or the lemon extract. Instead add 1 tsp almond extract.

Zucchini Almond Whoopie Pie with Almond Cream Cheese Filling


The “Almost Breakfast” Whoopie Pies

written by Becky

Banana Bread-Chocolate Chip Whoopie Pies with Dulce de Leche Buttercream 

As is usually the case with any banana baking, the plan was to use up the rather brown 3 bananas that I had in the fridge. I had several thoughts of what to do with these inedible rejects including the usual banana bread, healthy banana oat or bran muffins, or of course Banana Whoopie Pies. And I had a mission to fulfill with these bananas: make

something for lab meeting since I was presenting and I like to provide something tasty and home-baked to distract people before I start presenting! In my head, people go easier on you if they are sweetened up a little!

The problem was that that I felt like Whoopie Pies might be a little sweet for a morning lab meeting. But when I realized that I needed to make some dessert to take to a friend’s for dinner on Saturday, I figured I would multi-purpose some Whoopie Pies and just make my lab-mates endure the sweetness at 10:30am. I had thought that I would try to make a more breakfast version by making them banana oat but since they needed to also now be served for dessert, they had to be banana-chocolate instead! But they are made with half whole wheat flour so they are almost breakfast-like!!

As a sidenote, I do realize this is the second Banana Whoopie Pie on this blog but I still needed to try the recipe in the book! Plus, I had to use up those 3 bananas and needed something not too sweet for lab meeting! So it made sense to me!

I mostly followed the recipe from the Whoopie Pie cookbook but changed it enough that I can actually

call it my own! Apparently you need to change 3 things in a recipe to call it your own but I will still comment that I adapted the recipe from this one!

For the filling, I had some Banana Dulce de Leche sauce I had bought awhile back, which I never really knew what to do with but I wanted to try it, and I decided that it would work just mixed into a regular buttercream. It ended up a not very strong flavour but it was the PERFECT texture to pipe!

In the end, I created a delicious cookie that really tasted more like sup

er moist banana bread with a creamy tasty filling! Mmm… it had great reviews. And, the friend that I took these creations to on Saturday night did eat her leftovers for breakfast Sunday, prior to going for a run with me!

Next time, I will try to make this even more breakfast like and make a Banana Oat Whoopie Pie (sans chocolate chips)  with maybe Honey Cream Cheese Filling? Or the Peanut Butter buttercream would be good… or I mentioned a Nutella filling and had people drooling…

PS. sorry to those at work that aren’t in my lab that missed out on sampling these ones! I ran out 😦

Banana Chocolate Chip Whoopie

  • 1 cup all-purpose flour
  • 1 cup whole wheat flour
  • 1 tsp baking soda
  • 1/2 tsp cinnamon
  • 1/2 tsp salt
  • 6 Tb unsalted butter, at room temp
  • 2 Tb shortening
  • 1/2 cup white sugar
  • 1/4 cup brown sugar
  • 1 tsp vanilla
  • 2 large eggs
  • 3 very ripe bananas, mashed
  • 1 cup mini chocolate chips
  1. Line two baking sheets with parchment paper and preheat oven to 350.
  2. Whisk together the two flours, baking soda, cinnamon and salt.
  3. In a stand mixer (or just a bowl with beaters), beat butter, shortening and vanilla until light and creamy. Add the eggs one at a time and beat until well mixed.
  4. Add bananas and beat for about 2 minutes. Beat in dry ingredients with mixer on low just until mixed. Mix in chocolate chips.
  5. Using a spoon or a cookie scoop, portion batter onto baking sheets about 2 inches apart.
  6. Bake 8-10 minutes (depends on your pan and your oven etc) until the cakes look slightly brown and cooked. Allow to cool on baking sheet for a couple minutes before transferring to rack to cool.
As a sidenote, you could use all butter and no shortening, I just happen to have shortening. Plus I have read a few placed that say it makes for lighter, fluffier baking so I thought I would use some. The original recipe actually calls for a 50:50 mix of butter & shortening but I really don’t like shortening.

Dulce de Leche Buttercream

  • 1/2 cup butter, room temp
  • 1 tsp vanilla
  • 1/4 tsp salt
  • 1/4 cup dulce de leche sauce
  • 2 cups icing or confectioners sugar
  • 2-3 tsp water if necessary
Beat butter until creamy. Add vanilla and then sauce. Beat in sugar 1/2 cup at a time. If it is stiff, add water to get a creamy smooth consistency. I honestly don’t remember if this is exactly what I did and really I just dumped the rest of the sauce in that I had but hopefully it should work!